Skip to content

Max Haase

About Max Haase

http://max-haase.com

Posts by Max Haase:

Blog – Travelogues Drone footage — Image 11

Tourism Board Cooperation 2026: Guide for Influencer Partnerships

Tourism Board Cooperation – How professional collaboration with travel creators works

In over ten years as a travel content creator, I have Tourism Board collaborations with official destination marketing organizations from over 30 countries Implemented – by the New Zealand Tourism Board, Visit Saudi Arabia, and Visit Venezuela. This guide shows tourism boards, PR agencies, and destination managers the complete professional process of a Influencer marketing campaign in tourism: from the initial inquiry through creative concept, contract and production phase to final reporting.

For creators, this same guide offers an honest inside look at a business that, from the outside, appears to be a dream job, but in reality requires clear structures, contractual agreements, and demanding production phases. Those who understand the rules of the game—both creators and clients—save money and time and produce campaigns that deliver a truly measurable ROI.

  • Experience base: 30+ Tourism Board partnerships in 10 years – New Zealand, Visit Saudi, ProColombia, Basque Country, Visit Venezuela, Visit Morocco, Armenia Tourism, Turkiye Tourism and many more. 3-5 inbound inquiries per week.
  • Content scope per campaign: Typically 1-2 feed posts, 1-3 reels and accompanying stories, with an additional SEO-optimized blog pillar for larger deals – with a clear focus on quality rather than quantity.
  • Fee range: Individual campaign Mid-Tier €2,000-€8,000, Macro-Creator €8,000-€25,000, Mega-Creator €15,000-€50,000+, Long-term ambassador €50,000-€200,000+ for 6-12 months.
  • Inbound positioning: Today, the vast majority of inquiries come directly from tourism boards, luxury hotels and specialized influencer agencies – often even with long-term ambassador offers, long before an active pitch would be necessary.
  • ROI for Tourism Boards: Premium campaigns with mega creators regularly deliver several million video views, measurable search lift on destination keywords, and lasting SEO assets through accompanying blog articles.

What are Tourism Board collaborations in destination marketing?

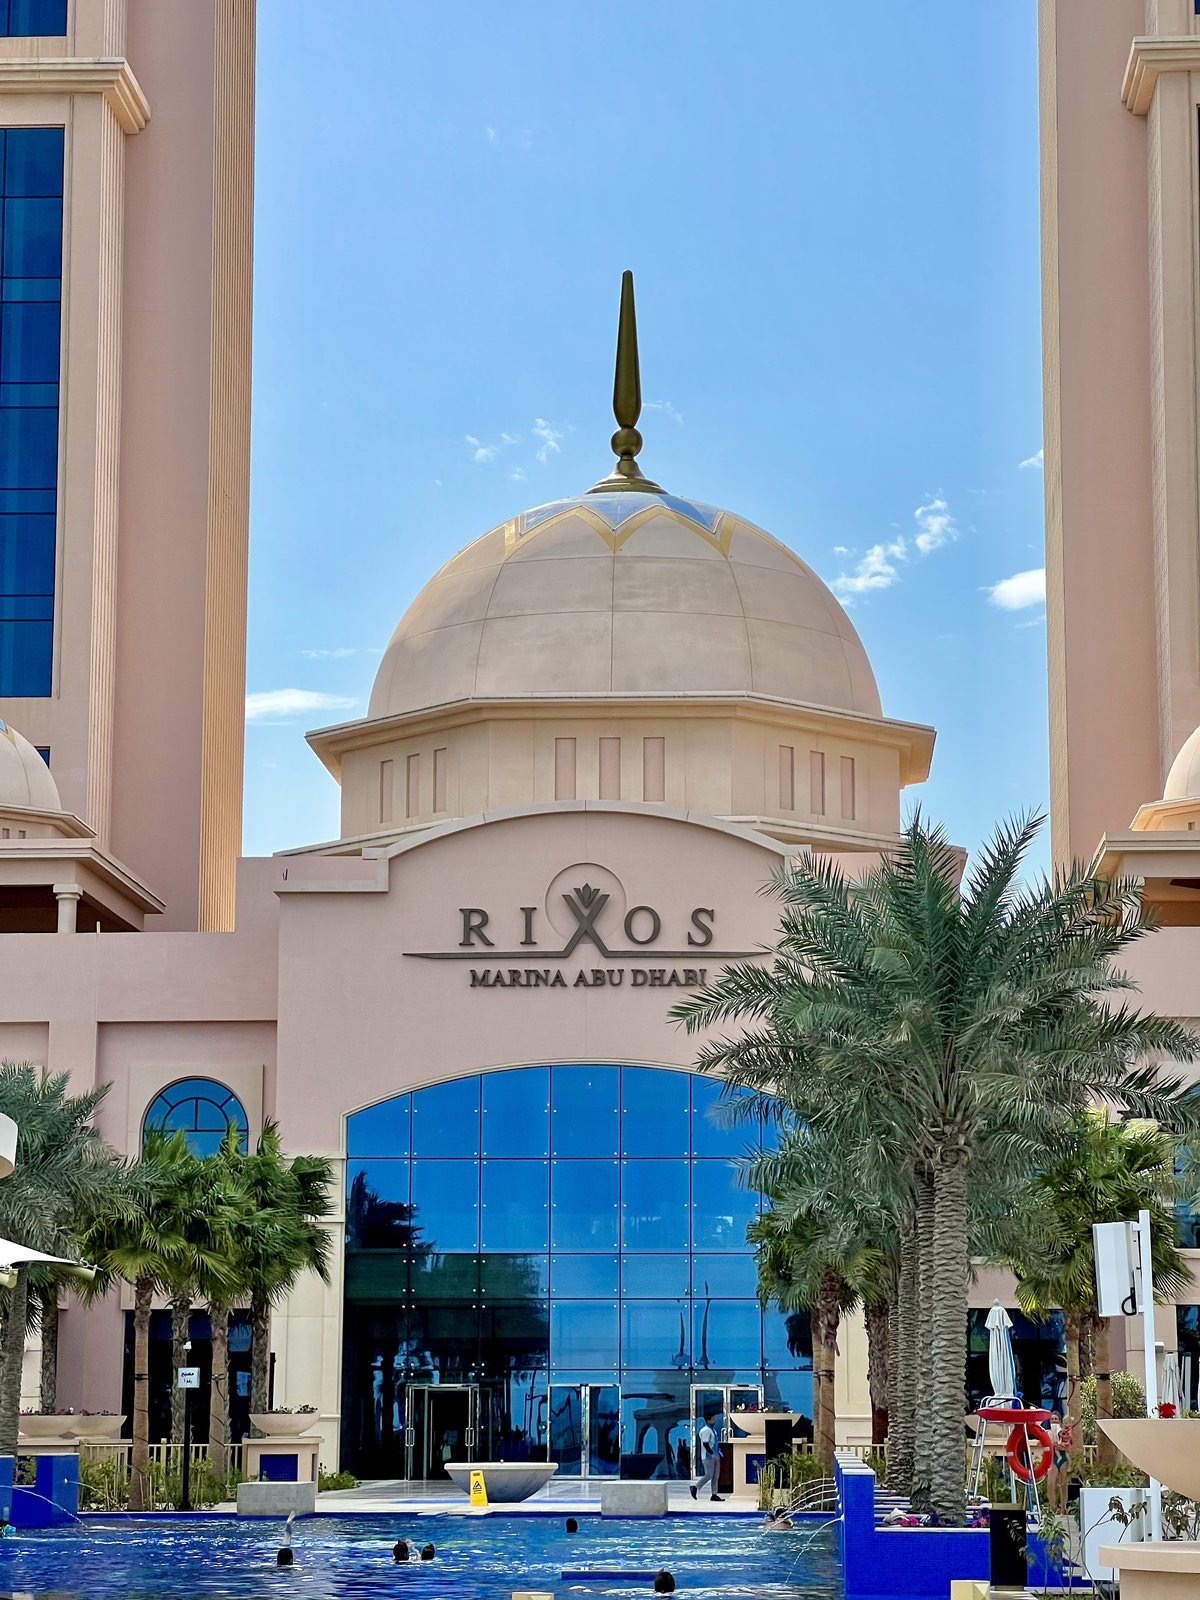
Tourism Boards are the official Destination Marketing Organizations (DMOs) of countries, regions, or cities. They have marketing budgets to position their country or region internationally as a travel destination – and are increasingly working with travel content creators instead of traditional TV, print, or paid media advertising. The Saudi Tourism Board, for example, is investing billions in marketing Saudi Arabia as a new tourist destination; influencer marketing in tourism is a key component of this strategy.

A typical collaboration includes a clearly defined scope of work: number of posts, reels, and stories per channel, required hashtags and location tags, approval processes for texts and images, usage rights for the Tourism Board's own channels (website, social media, paid ads, print brochures), and reporting obligations at the end of the campaign. The scope ranges from a one-week press trip with a defined content output to multi-year brand ambassador programs – with corresponding budget ranges.

Key stakeholders on the tourism board side typically include: the marketing director or head of marketing, social media and/or influencer marketing managers, external PR and influencer agencies, and the legal department for contractual matters. The more professionally structured a tourism board is, the clearer the processes and the faster the negotiations proceed.

Why Tourism Boards rely on travel influencers instead of traditional advertising

Traditional destination marketing channels – TV commercials, print ads in travel magazines, airport posters – have lost considerable effectiveness in recent years. At the same time, over 60 percent of young target groups make their travel decisions on Instagram and Pinterest. For tourism boards, influencer marketing in tourism solves three key problems simultaneously:

  • Authenticity instead of advertising jargon: A creator who travels through a country for three weeks produces content that no advertising agency can replicate – real scenes, real surprises, real emotions.
  • Precise target group approach: Mega-creators bring with them a clearly defined community. For luxury destinations, it's not about quantity, but a target audience with purchasing power – and that's exactly what a creator with a premium positioning delivers.
  • Multi-channel output from a single letter: A single collaborative trip generates Instagram posts, Reels, Stories, an SEO-optimized blog article, and Pinterest pins. Tourism boards receive a complete content toolkit, not just a commercial.
  • Long-term SEO assets: A well-ranking blog post about a destination generates organic Google traffic for years. A TV campaign is over after six weeks; an article like "New Zealand Starry Skies" still ranks on page 1 five years later.
  • Measurable KPIs: Unlike traditional advertising, creator marketing is precisely measurable: reach, views, saves, shares, website clicks, search lift on destination keywords – everything is available in the report after the campaign.

How Tourism Boards contact me – almost exclusively inbound

As one of the most influential travel content creators in Europe with over 4.2 million Instagram followers and a combined following of over 6.7 million in [the context of the previous sentence]. Duo with Janet Dannehl In practice, I hardly need outbound pitching anymore. Inquiries come in on their own – continuously and from all relevant segments of destination marketing.

Typical landings 3-5 qualified inquiries per week My management inbox is flooded with inquiries – directly from tourism boards, specialized PR and influencer agencies in the tourism sector, luxury hotels, and brand ambassador programs. On average, I accept a maximum of one of these requests; the rest are rejected because the budget, timing, or positioning isn't a good fit.

This inbound dominance is no accident, but the result of years of strategic positioning: consistent brand aesthetics across all channels, top SEO rankings on relevant destination and B2B keywords, multiple verified reference campaigns with leading tourism boards, and a B2B-optimized Collaboration page, which clearly bundles all the key information for marketing managers.

The typical process of a Tourism Board cooperation

Phase 1: Contact, briefing and contract (2-8 weeks before the trip)

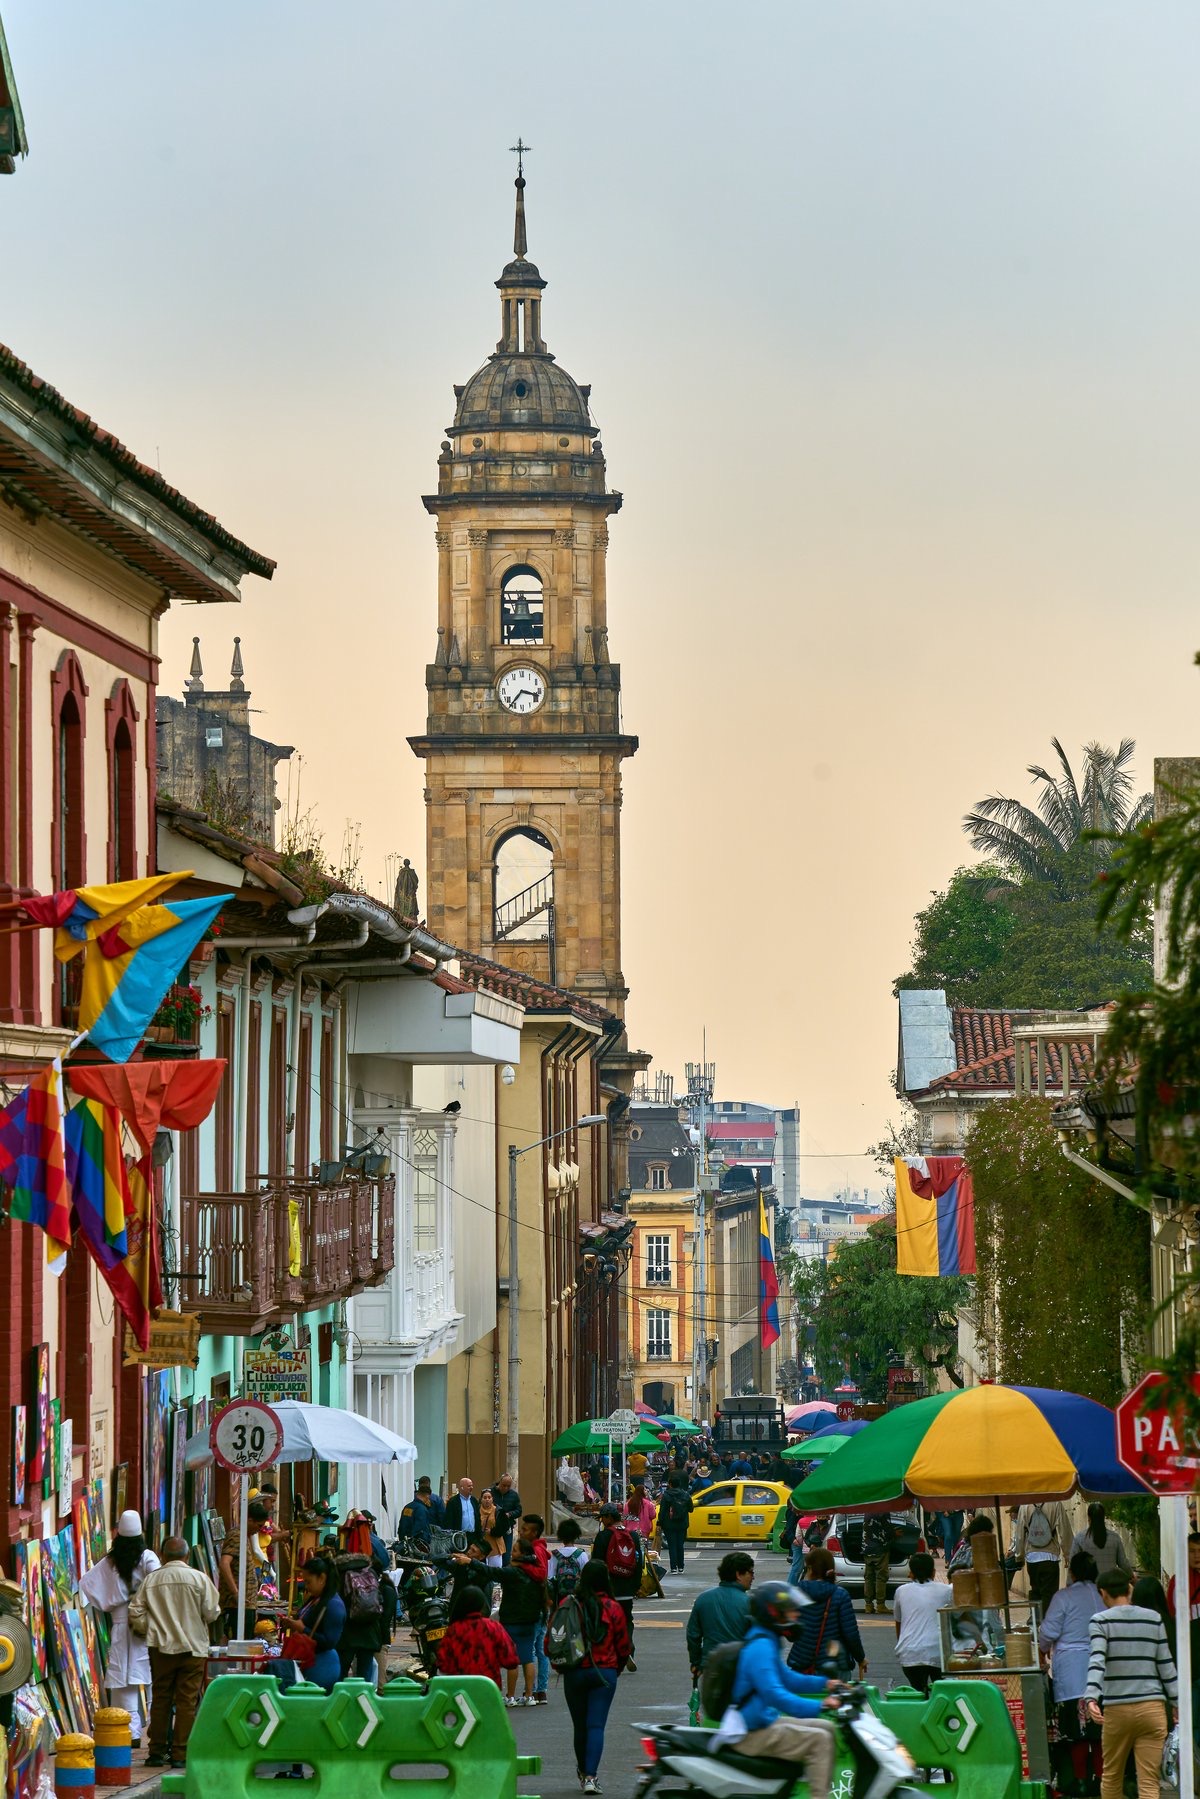
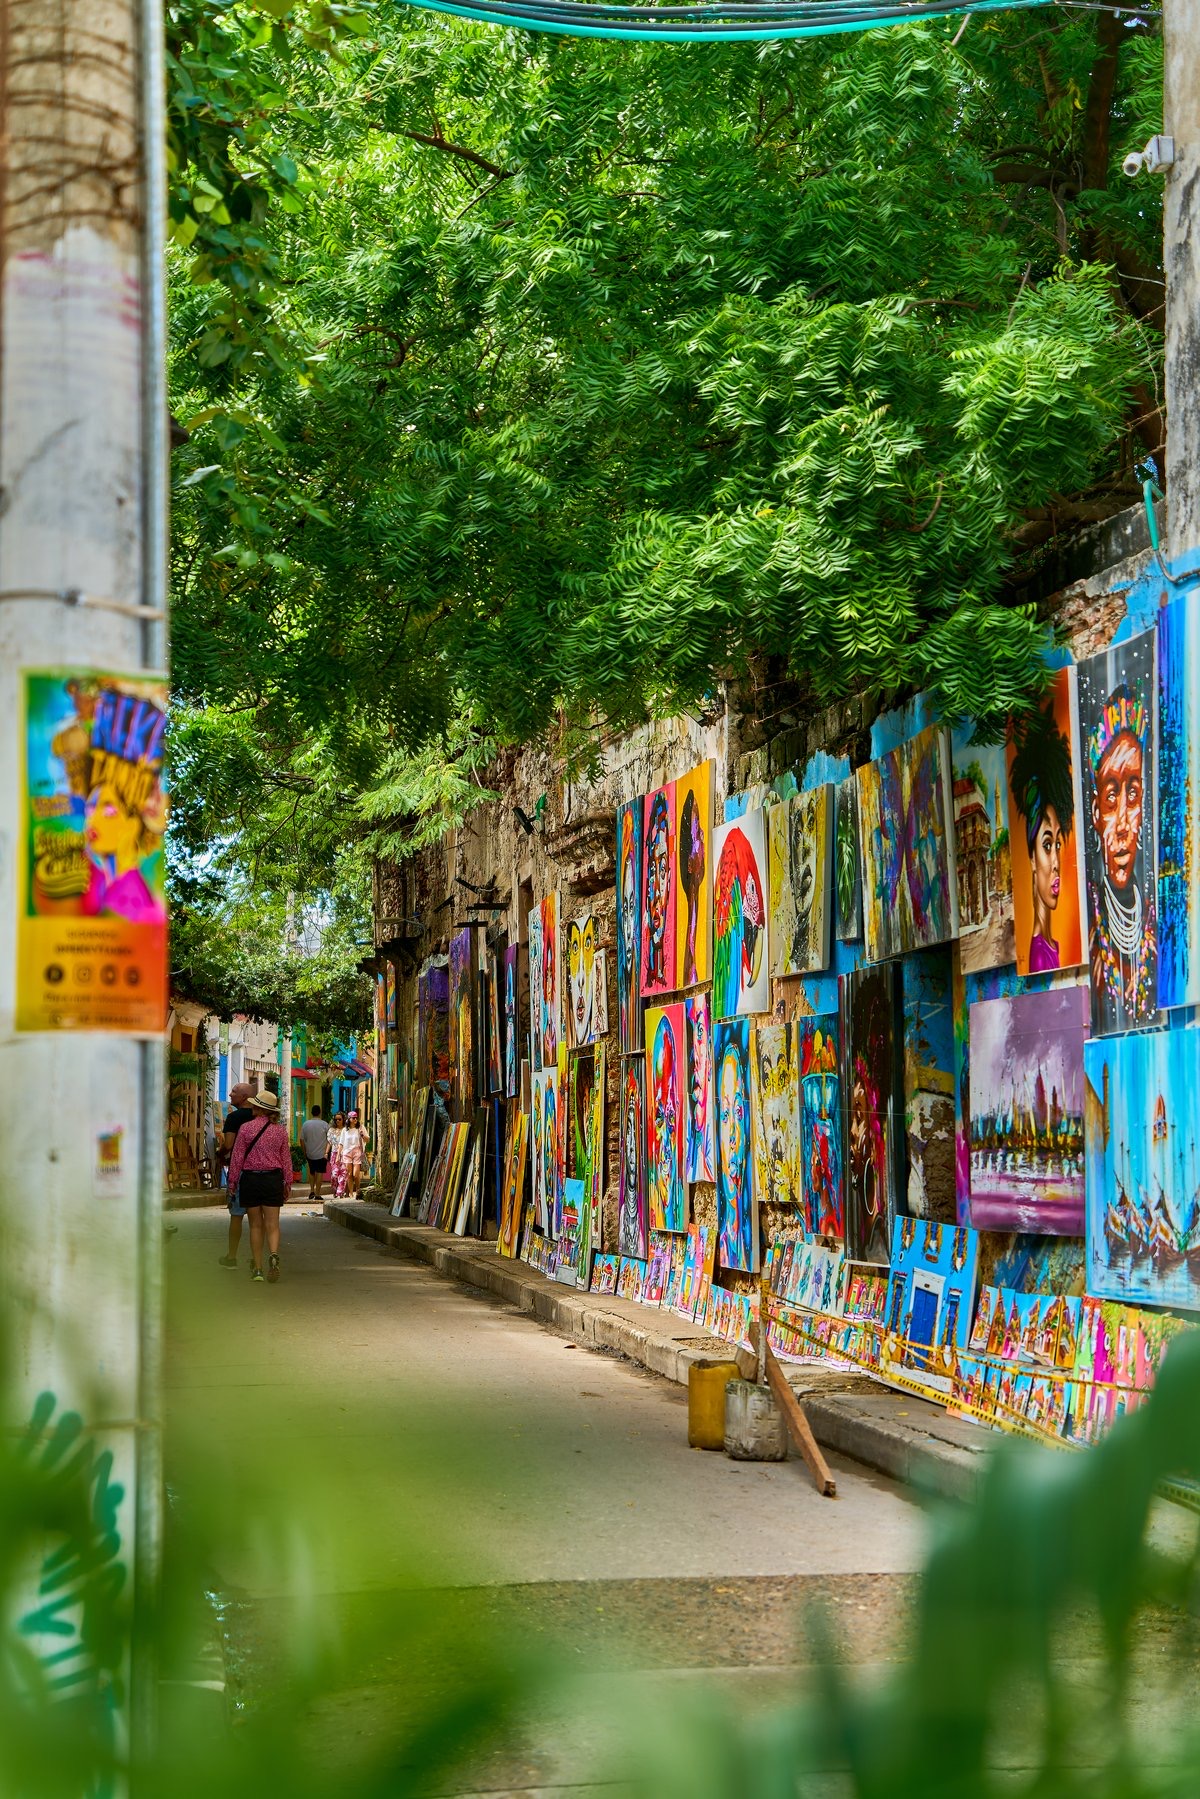
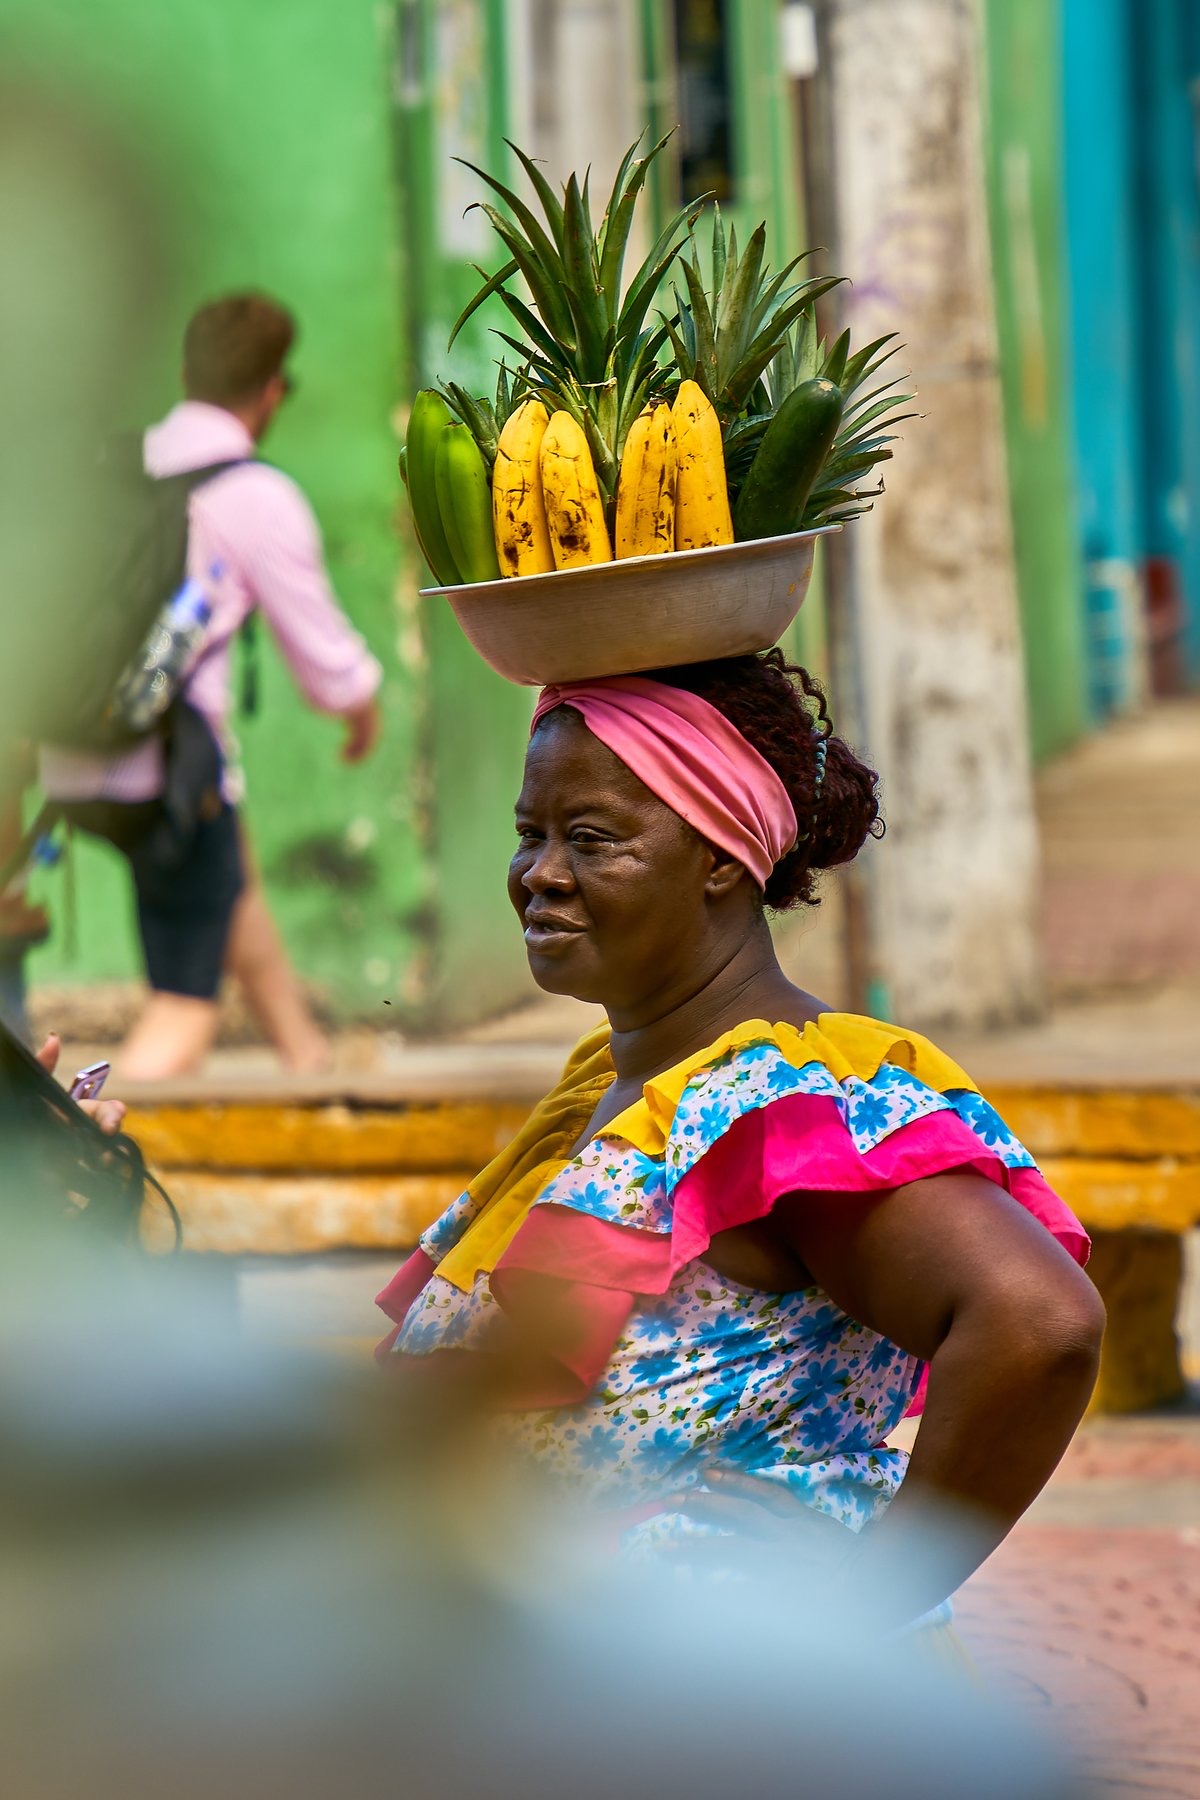
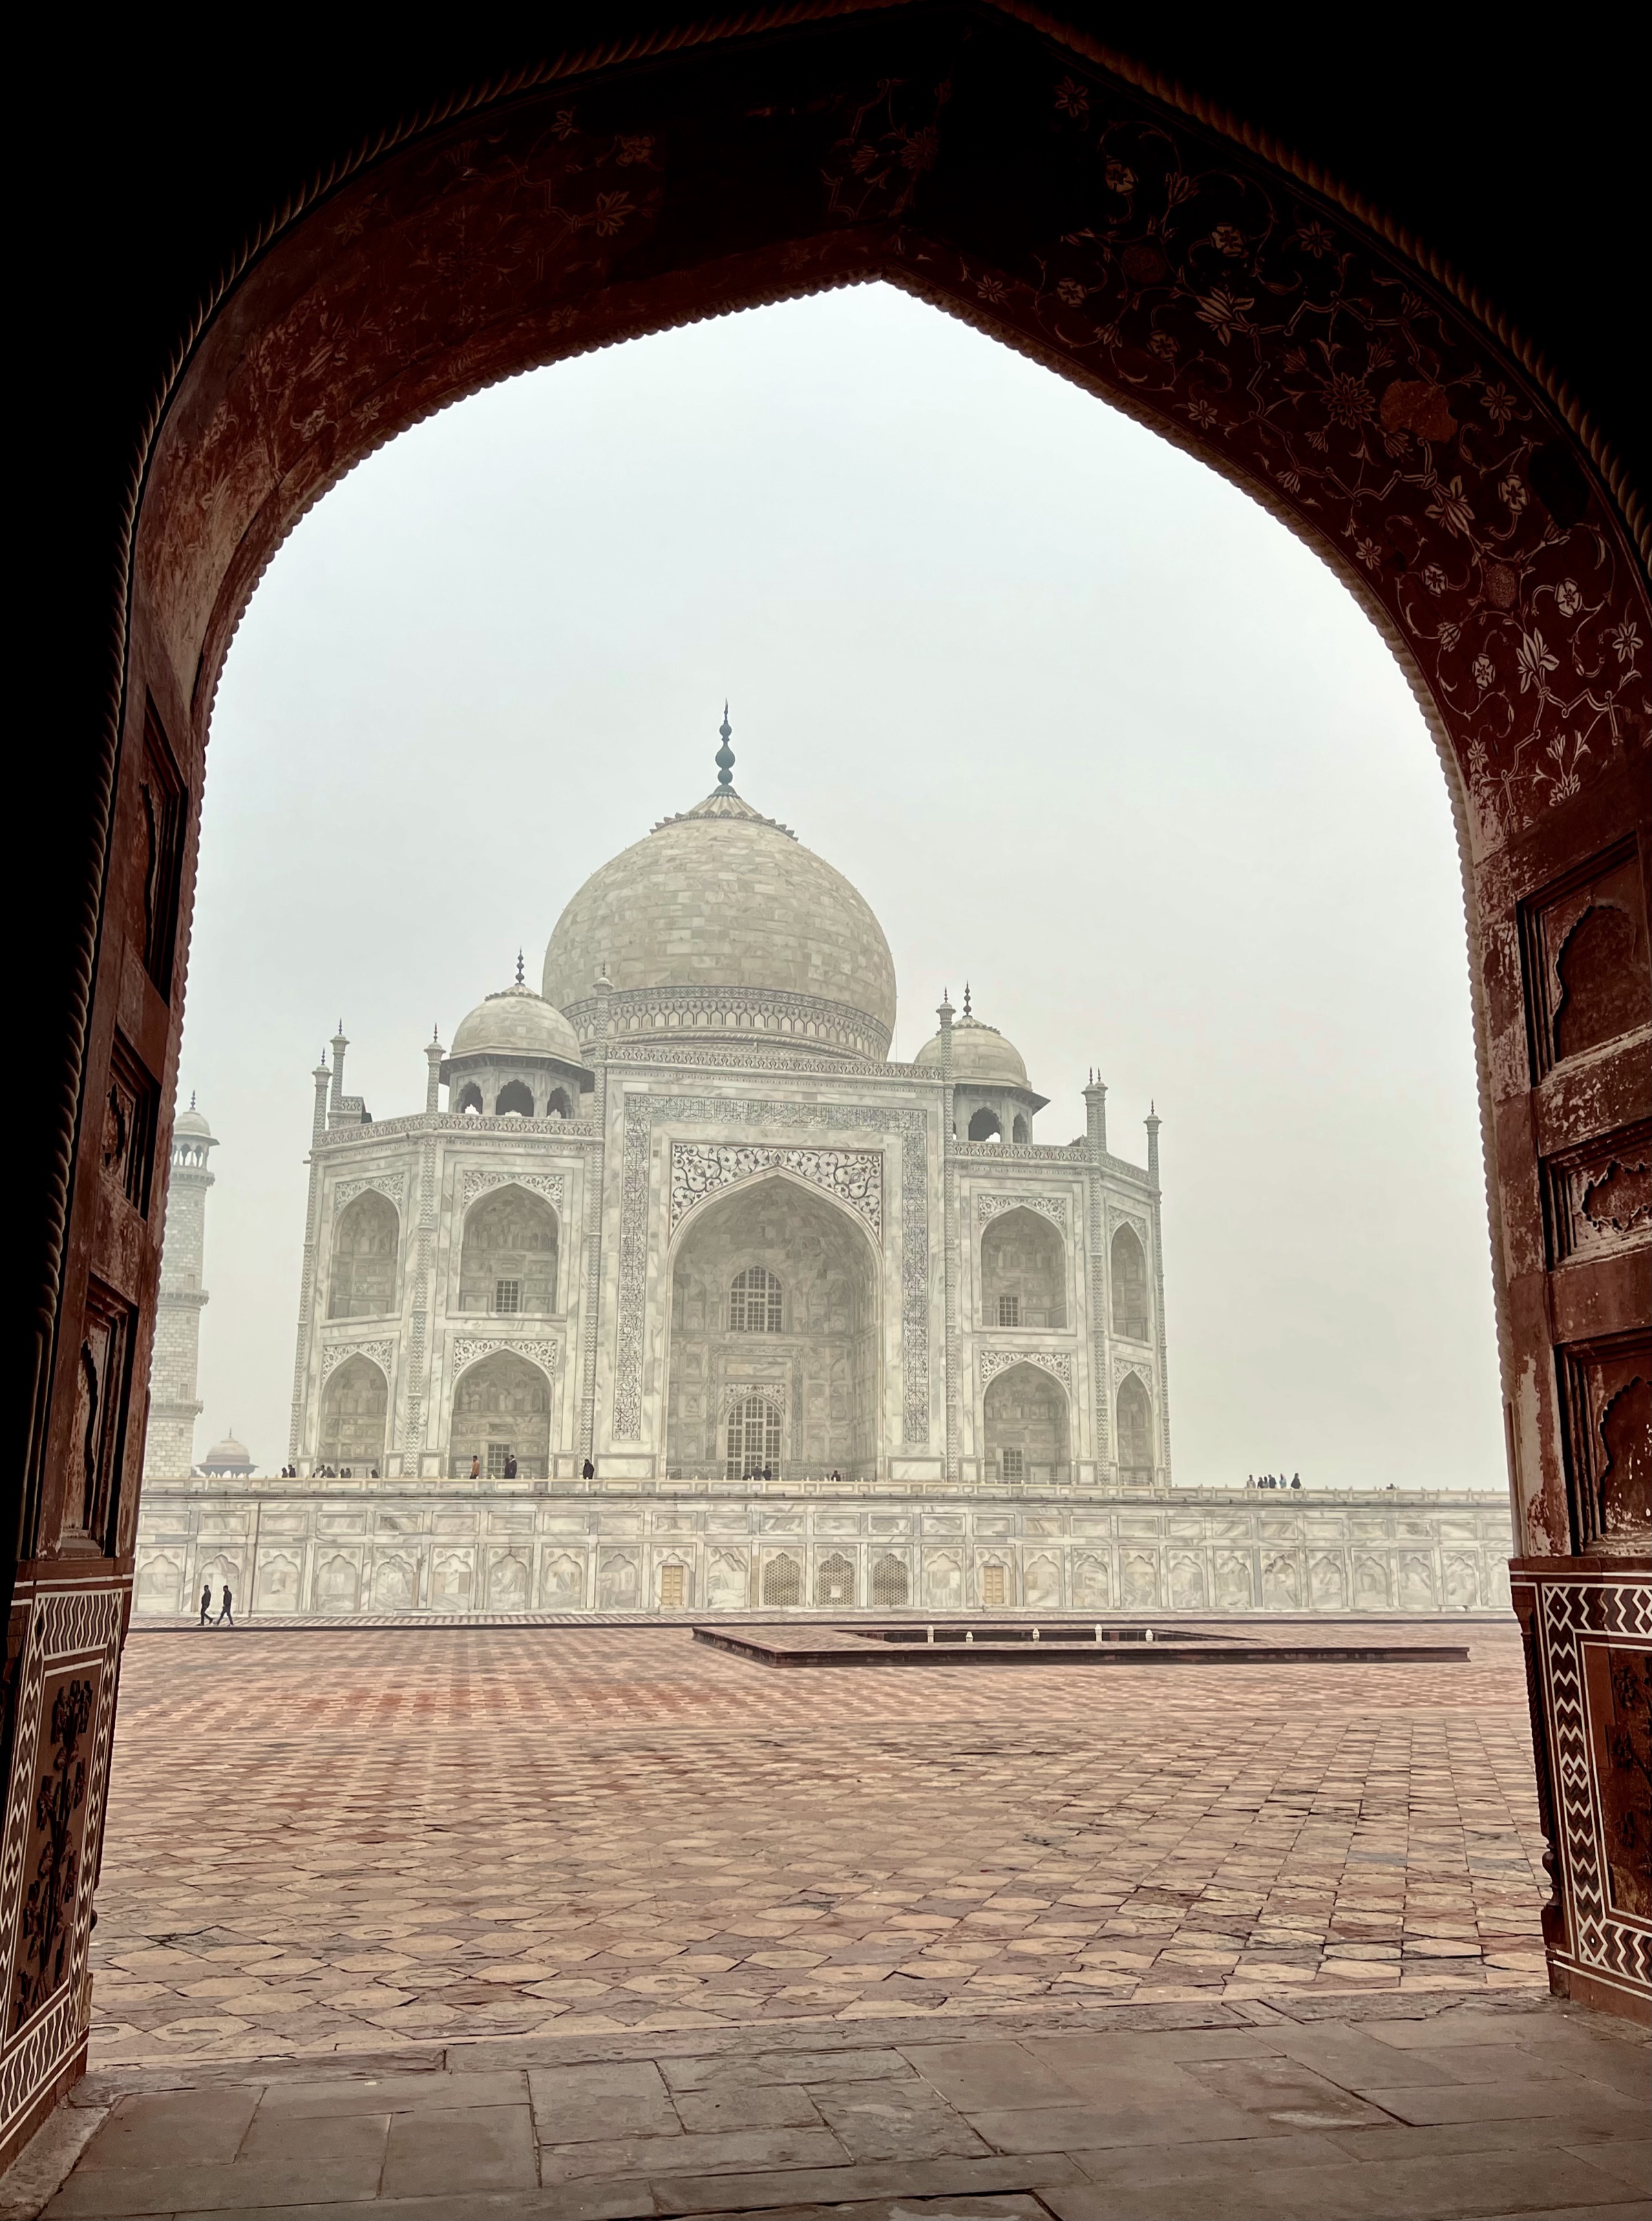
Following the initial contact, a detailed briefing is conducted, outlining the destination's key messages. For my ProColombia collaboration, the briefing was: "Showcase Colombia as a safe, diverse travel destination – moving away from its old narcos image." For Visit Saudi, the goal was: "Open Western travelers' eyes to modern Saudi Arabia." Based on these key messages, I develop the specific creative concept in collaboration with the Tourism Board.

During this phase, all terms and conditions are negotiated and put in writing: fee, travel expenses (business class flights, hotels, transfers, meals, entrance fees), content scope, usage rights, approval deadlines, exclusivity clauses, liability issues, force majeure provisions (e.g., weather risks), and payment terms. My standard procedure is: 50 percent deposit before the trip, 50 percent after content delivery and approval.

Phase 2: Travel and content production (5-14 days on site)

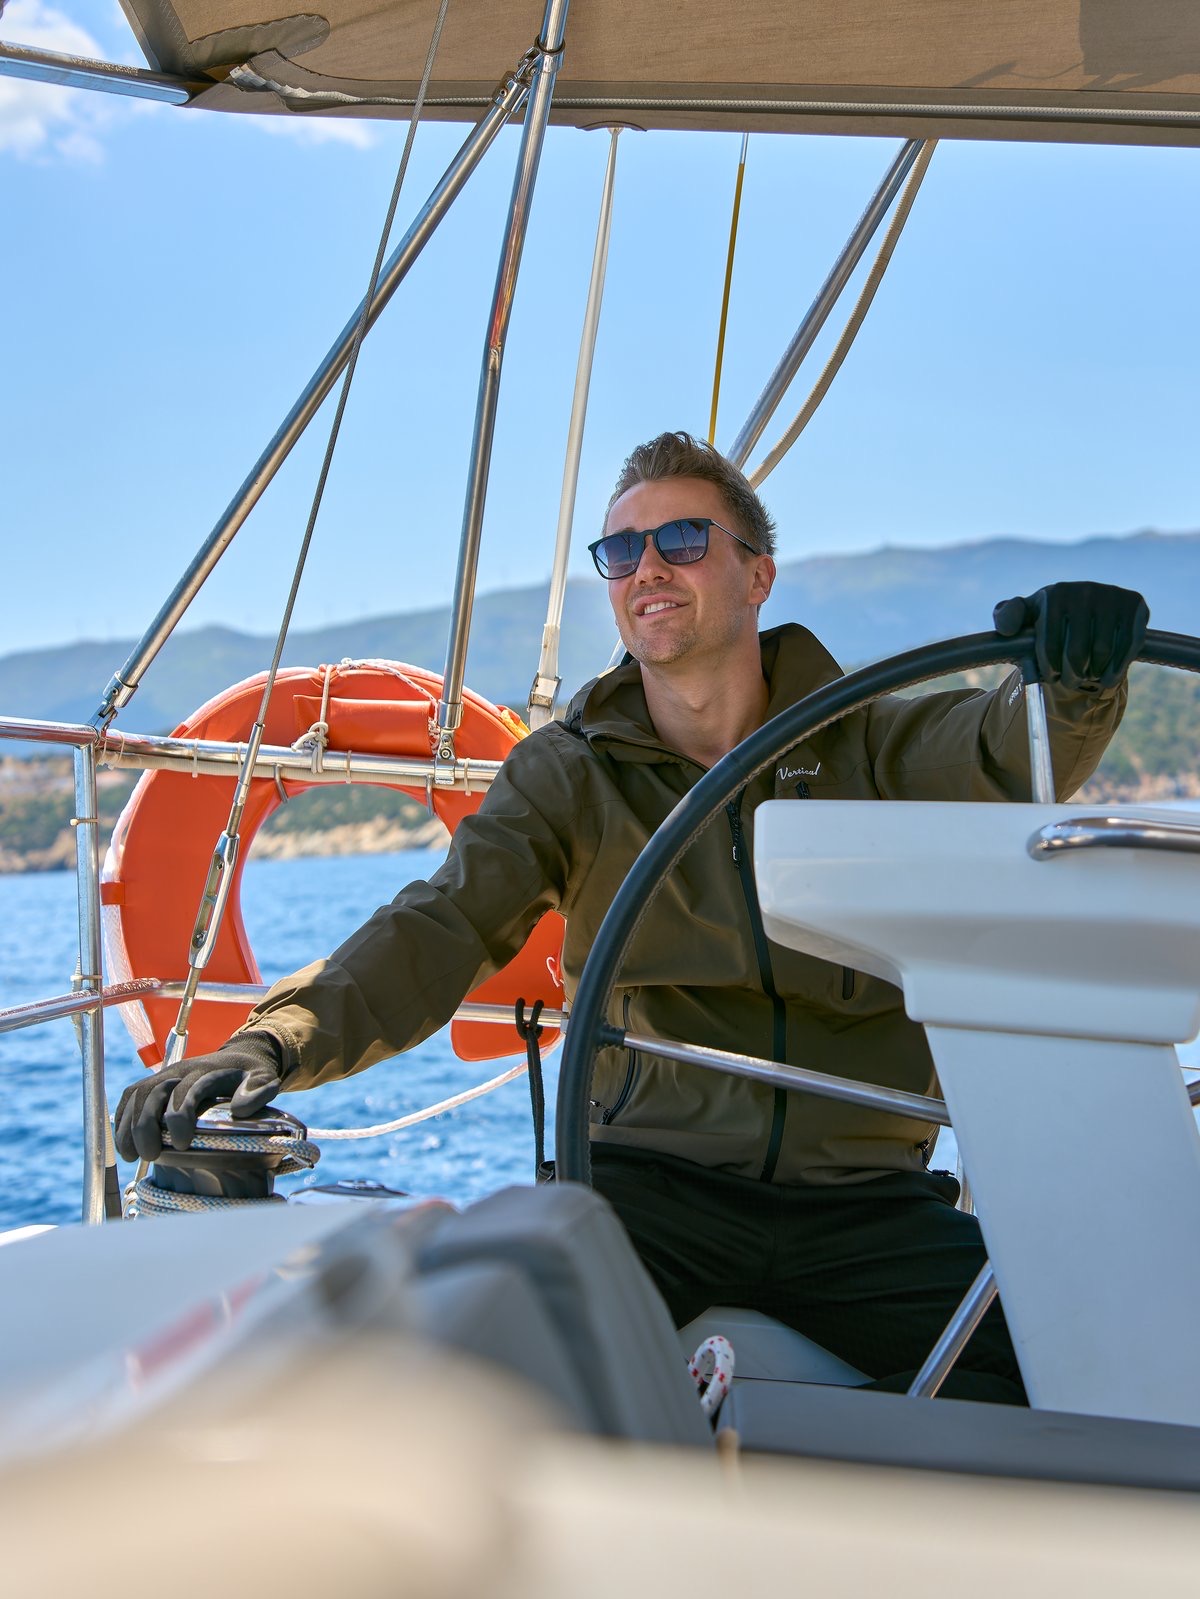
The actual production is the most intense phase. A typical day on tour: getting up at 4:30 a.m. for the best drone light during the golden hour, three to four locations in the morning, reviewing photos and videos after lunch, a second lighting session in the afternoon, and in the evening, initial editing and live Instagram Stories from the location. This is full-time work, often with little sleep – but with a clear production roadmap.

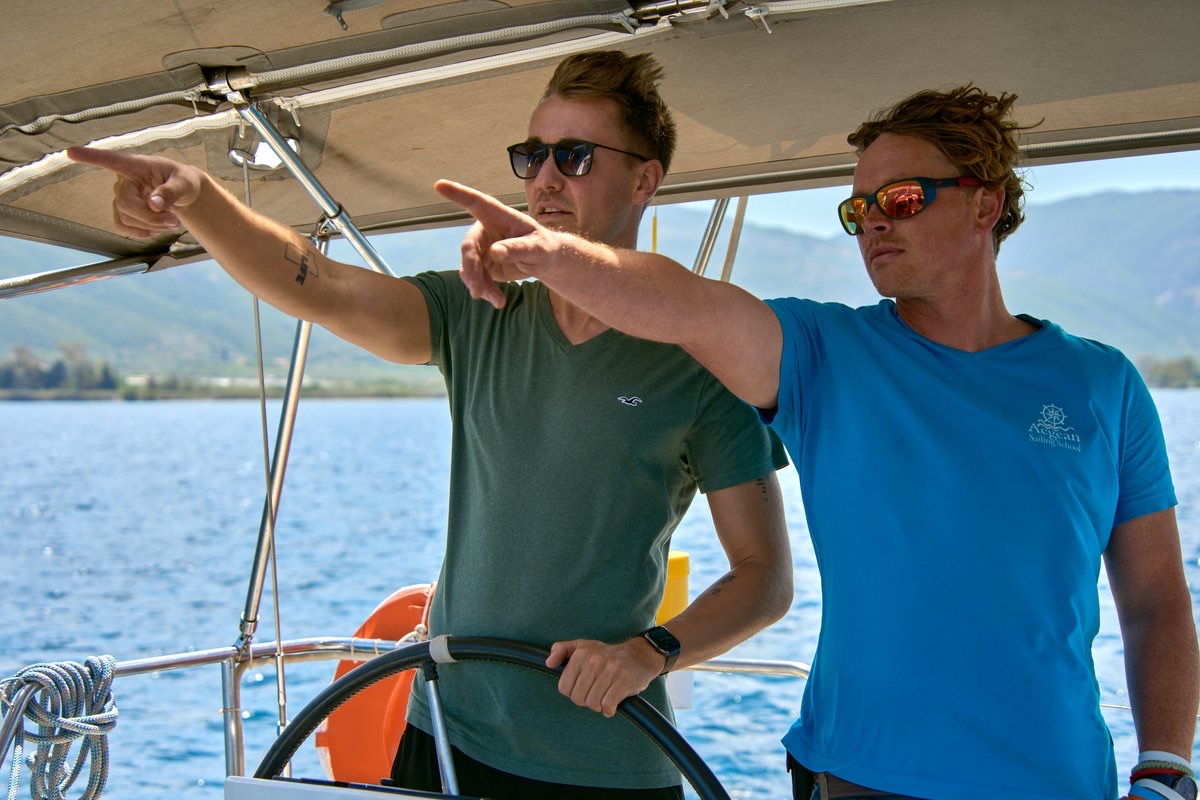
For more demanding campaigns, I travel with a team: a second camera operator for lifestyle shots, a producer for logistics and approvals, and a local fixer for location scouting. This increases the budget, but also the quality and predictability of the output.

Phase 3: Post-production, approval and release (2-6 weeks)

After the trip, the real craft begins: developing and grading RAW images, editing drone footage, creating reels with music sync and subtitles, writing SEO-optimized blog articles, and preparing stories in sequences. A typical campaign produces 1-2 high-quality feed posts, 1-3 reels, and a story sequence spanning several days. For more extensive campaigns, this also includes an SEO-optimized blog pillar with at least 2,500 words and several hundred high-resolution photos for the Tourism Board's own use. The deliberate focus on a few, excellently produced content units is part of my positioning: premium brands don't buy post frequency, but rather a visual identity with high recognition value. Total post-production time: 40-60 hours.

Before publication, a structured approval process takes place: the Tourism Board receives visual previews and caption drafts, has a defined feedback loop (typically 48 hours), and can request minor adjustments as long as these do not alter the fundamental creative direction of the content. This process protects both sides: the Tourism Board from off-brand content, and the creator from endless revisions.

Phase 4: Performance screenshots, transfer of usage rights and invoicing

At the end of the campaign, the Tourism Board receives the key performance indicators (KPIs) directly from Instagram Insights: screenshots of reach, impressions, engagement, saves, shares, and story completion rate for each piece of published content. This is deliberately kept concise – authentic raw data from the platform instead of a bloated agency report. In parallel, I provide the high-resolution media files in accordance with the separately agreed usage rights.

Fees and Rate Card: What do Tourism Board collaborations cost?

The question about fees is the most frequently asked – and the one with the most varied answers. The following range is a realistic overview of the DACH market, based on over 500 of our own campaigns and the prices of leading agencies. Travel influencers in Germany:

Type of cooperationCreator LevelFee range
Press trip (costs covered only)Nano/Micro (up to 100k)€0 + travel
Press trip + feeMicro (10–100k)€2,000–€8,000
Single campaignMacro (100k–1M)€8,000–30,000
Premium campaignMega (1M+)€15,000–100,000+
Long-term ambassadors (6–12 months)Mega (1M+)€50,000–200,000+
Important: These fees are gross campaign prices and do not include production costs. Flights, hotels, team costs (for multi-person shoots), equipment wear and tear, insurance, music licenses, and post-production hours are deducted from the gross fee – typically 30-50 percent of the total invoice amount. Important for tourism boards: a higher fee does not automatically mean a higher margin for the creator, but usually indicates a significantly higher production quality.

Case Studies: Reference campaigns with measurable results

The best reference for tourism boards, PR agencies and destination managers is not abstract figures, but concrete campaigns with publicly verifiable results:

Tourism New Zealand

Destination Campaign in New Zealand in collaboration with @purenewzealand (Tourism New Zealand). The campaign achieved measurable results across all channels:

Combined reach of all formats: over 11 million views (2 Reels + 1 Post + 15 Stories), over 255,000 Likes and 985+ Comments.

Visit Saudi

Destination Campaign in Saudi Arabia in cooperation with @visitsaudi (Visit Saudi). Publicly available results:

  • Reel 1 — Visit Saudi — 4.4 million views, 123,565 likes, 358 comments
  • Reel 2 — Visit Saudi — 2.8 million views, 83,245 likes, 406 comments
  • 15 Instagram Stories — 120,000–170,000 views each, totaling approximately 2.2 million story impressions.

Combined reach of all formats: over 9.4 million views (4.4M + 2.8M Reels + approx. 2.2M Story Impressions), over 206,000 Likes and 760+ Comments.

All reach and engagement figures are directly available on the public Instagram profile. @_maxhaase_ Visible and verifiable by everyone.

The five biggest mistakes in Tourism Board collaborations

1. Accept barter deals

The most common mistake – especially at the beginning: Tourism boards offer "flight plus hotel in exchange for content." This sounds tempting, but it's a losing proposition. You invest 40+ hours of professional work and get a trip worth perhaps €2,000 – an hourly wage of under €50, no social security, no reserves for equipment replacement. From the mid-tier level onward, the rule is: no fee, no cooperation. Exceptions are only worthwhile for absolute dream destinations with strategic portfolio value.

2. No written contract

No contract, no production. Early in my career, I produced content for a tourism board that then didn't pay for months. Since then, I've worked exclusively with a signed contract, a 50 percent deposit before the trip, and a clearly defined payment due date after content delivery.

3. Promising too much content

Many creators try to outdo each other in pitches with content promises: "20 posts, 10 reels, 50 stories!" The problem: quality suffers massively, the creator burns out, and the tourism board receives mediocre content. My rule of thumb: 1-2 feed posts and 1-3 reels per campaign – deliberately few, but of the highest professional standard.

4. Giving away usage rights

Usage rights are a separate commercial item. If the Tourism Board wants to use the images and videos for its own website, campaign paid ads, brochures or outdoor advertising, this costs extra – usually a 30-50 percent surcharge on the basic fee, tiered according to usage duration (6 months, 12 months, unlimited) and channel scope (organic only vs. including paid).

5. Inability to say no

Not every inquiry is a good collaboration. I reject over 95 percent of all inbound inquiries – either because the budget isn't right, the destination doesn't fit my brand positioning (luxury & adventure instead of mass tourism), or the key messages are too restrictive. Incidentally, this is a good sign for tourism boards: anyone who says yes to every letter is working with rock-bottom prices – every brand realizes that sooner or later.

Which tourism boards have the highest budgets?

Practical experience reveals clear regional differences in budget willingness:

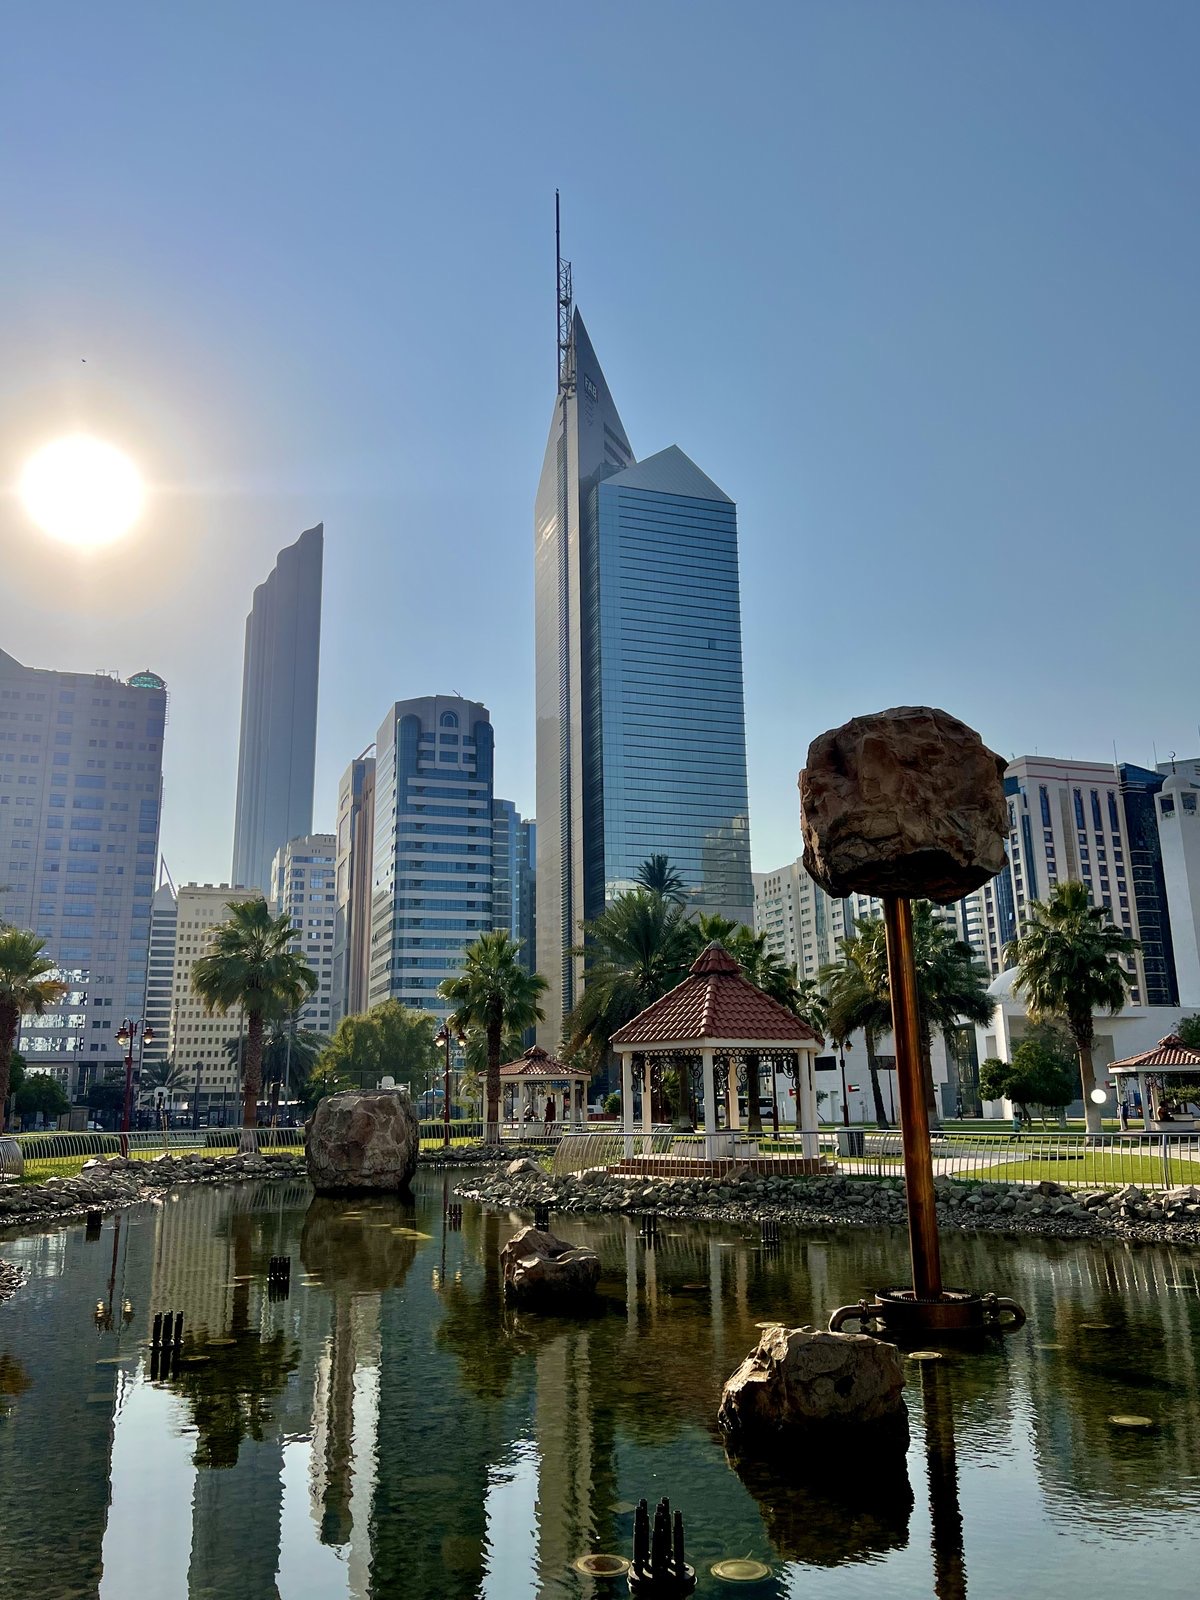
  • Highest budgets: Middle East (Saudi Arabia, UAE, Qatar, Oman), South Korea, Japan, Singapore – premium prices are paid here, often with 6-figure campaign budgets per mega-creator.
  • Good budgets: Scandinavia, Australia, New Zealand, Canada, USA – professional marketing departments with realistic budgets and structured processes.
  • Solid budgets: Southern Europe (Portugal, Greece, Croatia, Italy), Türkiye, Morocco – usually tighter budgets, but often more creative concepts and shorter approval processes.
  • Tight budgets: Southeast Asia, Eastern Europe, Central America – bartering is predominantly offered here; paid collaborations are less common and usually negotiated through mega-creator agencies.

Creator Level in the Tourism Board Market – What Differentiates Tourism Boards When Choosing One

In tourism marketing, there are clearly defined creator levels that tourism boards strategically use when selecting partners. Destination managers benefit from understanding these levels in order to choose the appropriate budget and target audience approach.

  • Micro & Mid-Tier (10k-500k Followers): Suitable for regionally focused campaigns with a narrow niche fit, often without payment in exchange for a press trip. High discovery value, but limited international reach.
  • Macro (500k-1M Followers): Professionally set up, typically booked through agencies, solid reach in the DACH region. Suitable for individual campaigns with a clearly defined output.
  • Mega-Creator (1M+ Followers): Premium positioning, international reach, in-house management structures. With 4.2 million followers on Instagram, I currently occupy this league – and in the Duo with Janet Dannehl With a combined reach of over 6.7 million. Here are the most exciting deals: premium campaigns, long-term ambassador programs, and content that pays for both reach and prestige.

The role of PR and influencer agencies

Many tourism boards do not work directly with individual creators, but rather through specialized platforms. PR and influencer agencies in tourism. These agencies curate the creator selection, organize travel, manage approval loops, and handle billing. As a creator, you then have two points of contact: the agency for day-to-day operations and the Tourism Board for strategic questions and final approvals.

Experiences with agencies are mixed. Good agencies understand the dynamics of the creator economy, respect creative freedom, pay on time, and deliver high-quality briefs. Bad agencies try to squeeze out as much content as possible for as little money as possible and treat creators like interchangeable service providers – this often results in a loss of quality on both sides.

For tourism boards looking to hire an agency, a specialized influencer agency with a tourism focus saves time and effort, but charges a 15-25 percent service fee on top of the creator's payment. For smaller budgets, direct contact with the creator is usually more cost-effective.

My tip for tourism boards: Anyone who contacts creators directly and experiences a smooth process saves on agency fees in the long run and builds strong relationships with key creators. I work roughly half the time directly with tourism boards and half through agencies.

Content strategy for Tourism Board collaborations

Content for a tourism board serves two target groups simultaneously: its own creator community AND the key messages of destination marketing. Combining these two requirements is the central challenge – and the reason why tourism boards consciously work with creators rather than advertising agencies.

My basic principle: I always tell my personal story, not the official advertising message of the Tourism Board. „"I experienced X, discovered Y, and Z surprised me." This first-person perspective keeps the content authentic and presents the destination in an organically positive light – without blatant advertising language. The community recognizes advertising in three seconds; however, they trust a personal travelogue.

During my visit to Saudi Arabia, I didn't just photograph tourist attractions; I shared my genuine surprise at how modern, safe, and welcoming the country is. It was honest, authentic – and exactly the message the Tourism Board wanted to convey. Such alignment between creator narrative and destination key messages is crucial for campaign success.

From a craft perspective, I produce a maximum of two high-quality content units and at least one story sequence per day. I prefer less content with clear visuals and drone footage to a mass of content without a concept. Premium tourism boards book me precisely because of this focus on quality – not because of high posting frequency.

From Morocco to a portfolio of 30+ Tourism Boards

My first paid Tourism Board collaboration was with Visit Morocco —and that one also came about through inbound marketing. I had published a series of Morocco-related content on Instagram, simply because I was there privately. The responsible marketing manager of the Moroccan Tourism Board saw the posts, contacted me directly, and offered a fully organized week-long production in Morocco with a fee—without me ever having to submit a pitch.

From this initial campaign, a portfolio of over 30 Tourism Board partnerships has grown in the following years. Visit Morocco led to internal recommendations for me to other North African and Mediterranean destinations; the Visit Saudi campaign opened access to the Middle East; Tourism New Zealand resulted in follow-up projects in Oceania. Destination marketing managers are exceptionally well-connected – once a creator has delivered an outstanding campaign, follow-up inquiries multiply automatically.

For tourism boards, this is a robust reference structure: anyone who speaks with one of my clients today receives consistently positive feedback – reliable processes, flawless delivery, measurable results. This kind of reputation is precisely what cannot be replaced by advertising budgets in destination marketing.

Tourism Boards, Hotels & DMOs: How to book me as a Travel Creator

If you're looking for a travel creator for your tourism board, hotel, or destination marketing organization who can deliver a clearly curated, high-end audience, multi-channel output, and long-term SEO assets, you'll find all the relevant information about services, packages, and terms on my website. Collaboration page.

Typical collaboration models:

  • Destinations campaign: 7-14 days of on-site production, multi-channel content (Instagram feed, Reels, Stories, blog), performance screenshots from Instagram Insights at the end of the campaign.
  • Luxury Hotel Campaign: 3-5 day shoot on-property, hero reel plus feed series, blog review with SEO optimization.
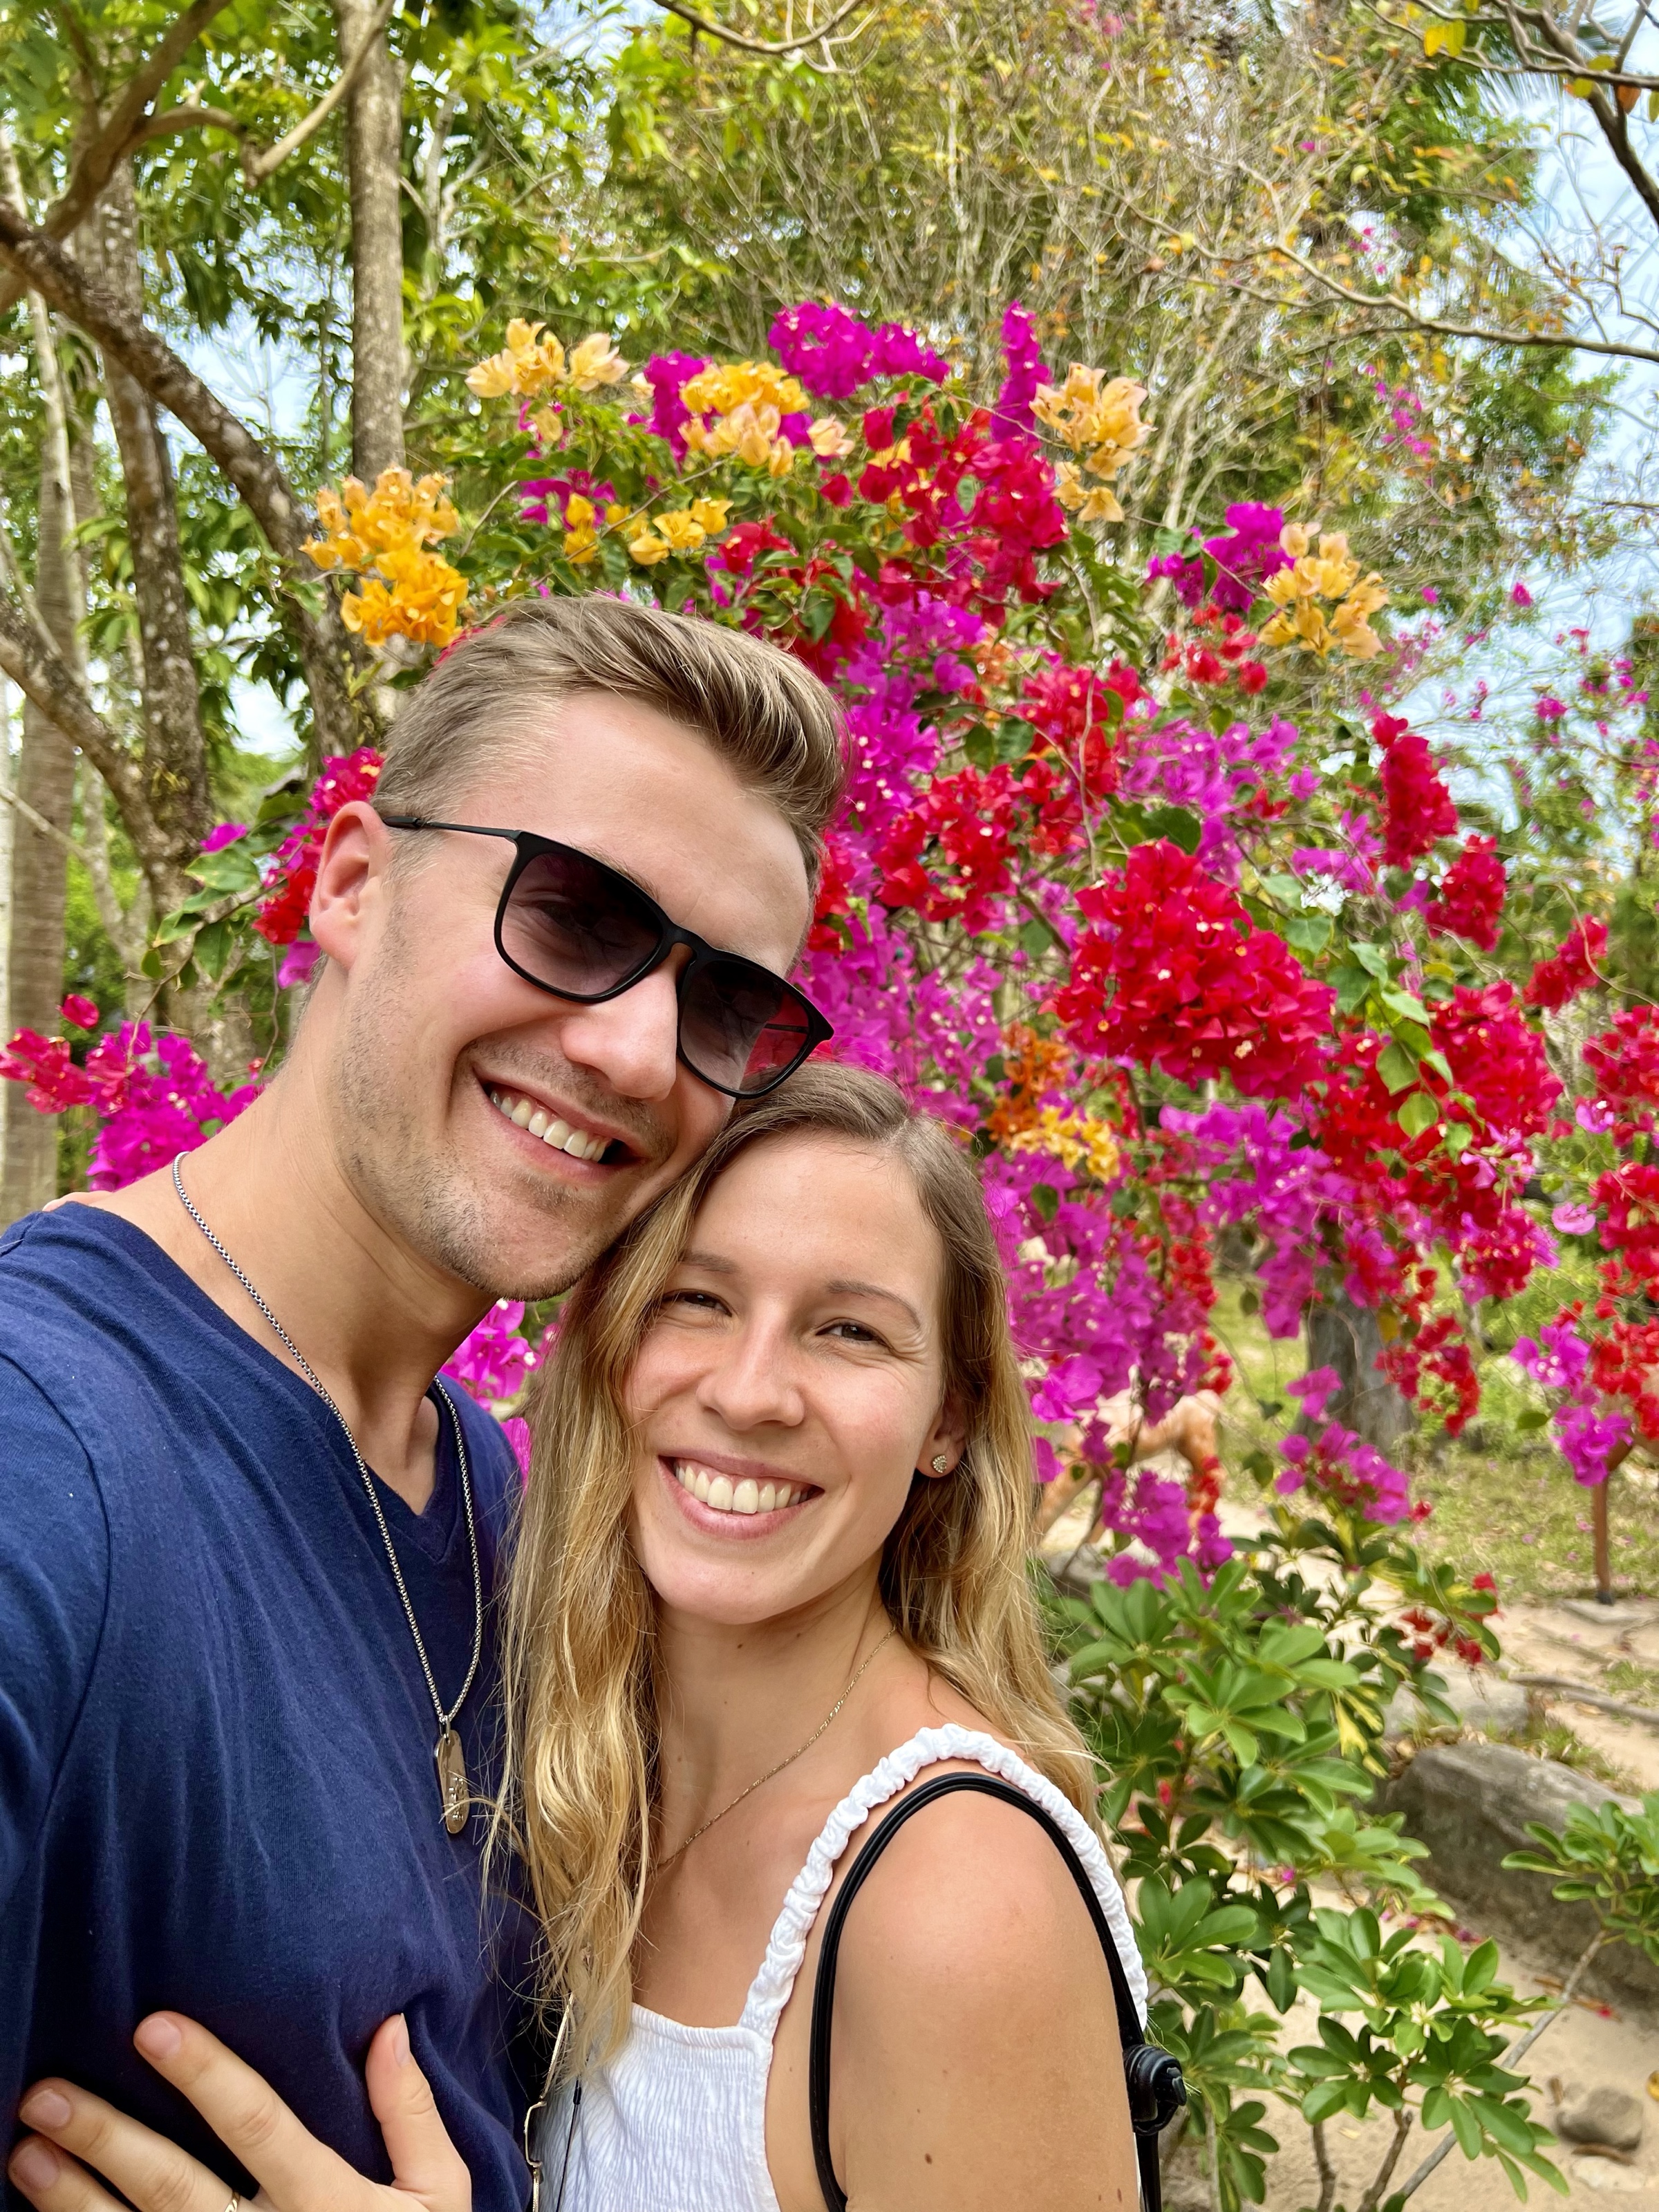
  • Duo campaign with Janet Dannehl: 6.7 million combined reach – ideal for destinations focused on couples/families. Details at Travel Couple.
  • Long-term ambassador program: 6-12 months, multiple campaigns per year, exclusivity in the segment.

The best way to start your inquiry is by email to [email protected] Please include the destination, timeframe, and campaign goals. My management will get back to you as soon as possible.

FAQ – Frequently Asked Questions about Tourism Board Cooperations

How can I, as a tourism board, find the right travel creator?

Key selection criteria include target group match (Germany, Austria, Switzerland, USA, Asia-Pacific), niche fit (luxury, adventure, family, budget), demonstrable engagement rate (at least 1 percent for mega-creators – anything above that is already strong for accounts with 1M+ followers), quality of previous Tourism Board campaigns, and reliability in collaboration. A professional Collaboration page and an up-to-date media kit are minimum requirements.

Do I need a certain number of followers for Tourism Board collaborations?

Not necessarily. Some tourism boards already work with micro-influencers with as few as 10,000 followers – though usually without payment and as a classic blogger trip. For paid collaborations, the threshold in Germany, Austria, and Switzerland (DACH region) is typically 100,000+ followers, depending on the niche and engagement rate. In the luxury segment, positioning and audience quality often count for more than sheer follower count.

How long does it take to establish a cooperation?

From initial contact to the trip, it typically takes 2-6 months. For more spontaneous projects, it sometimes only takes 2-3 weeks, while for large, long-term ambassador programs, it can take 6-12 months. I now plan my collaborations 3-6 months in advance – this gives both sides time for creative concept development, location scouting, and clearly negotiated contracts.

What happens if weather or other circumstances disrupt the planned production?

Every contract includes a force majeure clause that covers unforeseen events such as extreme weather, strikes, or political crises. During my Norway campaign, we had three days of fog – we adjusted the schedule flexibly, found alternative locations, and extended the trip by two days. Flexibility and a plan B are essential for professional productions; that's precisely why top-tier creators are hired.

What legal aspects are central to Tourism Board collaborations?

The most important points are: clear labeling as advertising/advertorial (#Ad/Paid Partnership tag on Instagram), usage rights scope (channel, duration, geography, paid media inclusion), exclusivity clauses (e.g., no competitor destination for 6 months after the campaign), image rights clearance for people shown, and liability regulations in case of accidents during production. For large-scale campaigns, I work with a law firm specializing in the creator economy.

Conclusion: Tourism Board collaborations – the heart of professional destination marketing

Tourism board collaborations are at the heart of my business as a travel creator – and also one of the most efficient channels currently available to tourism boards, hotels, and DMOs in destination marketing. They deliver authentic visuals, measurable KPIs, long-term SEO assets, and target group precision that traditional advertising simply can no longer achieve.

For creators: present yourself professionally, have a clear rate card, a sound contract, and deliver consistently. For tourism boards: choose the right partner with a suitable positioning, grant creative freedom, and formulate realistic briefs. If both sides do their homework, campaigns will emerge that generate not only reach but also actual travel bookings.
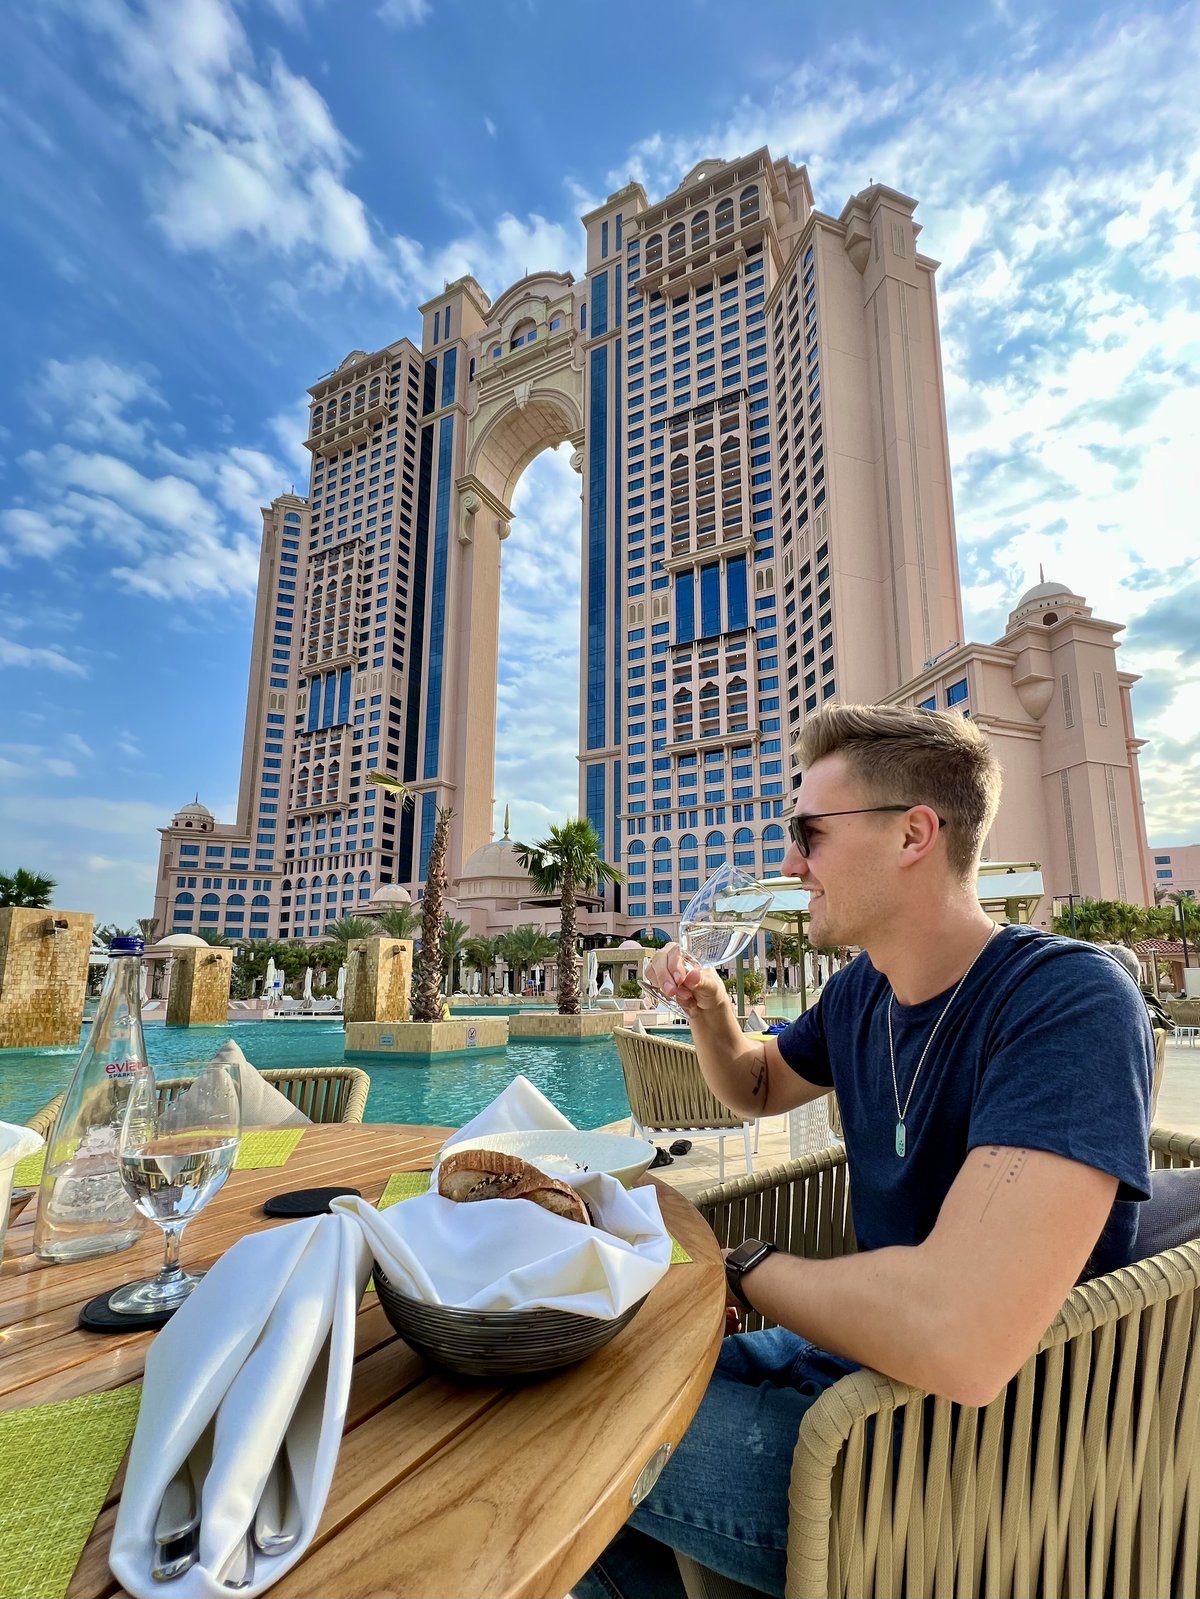
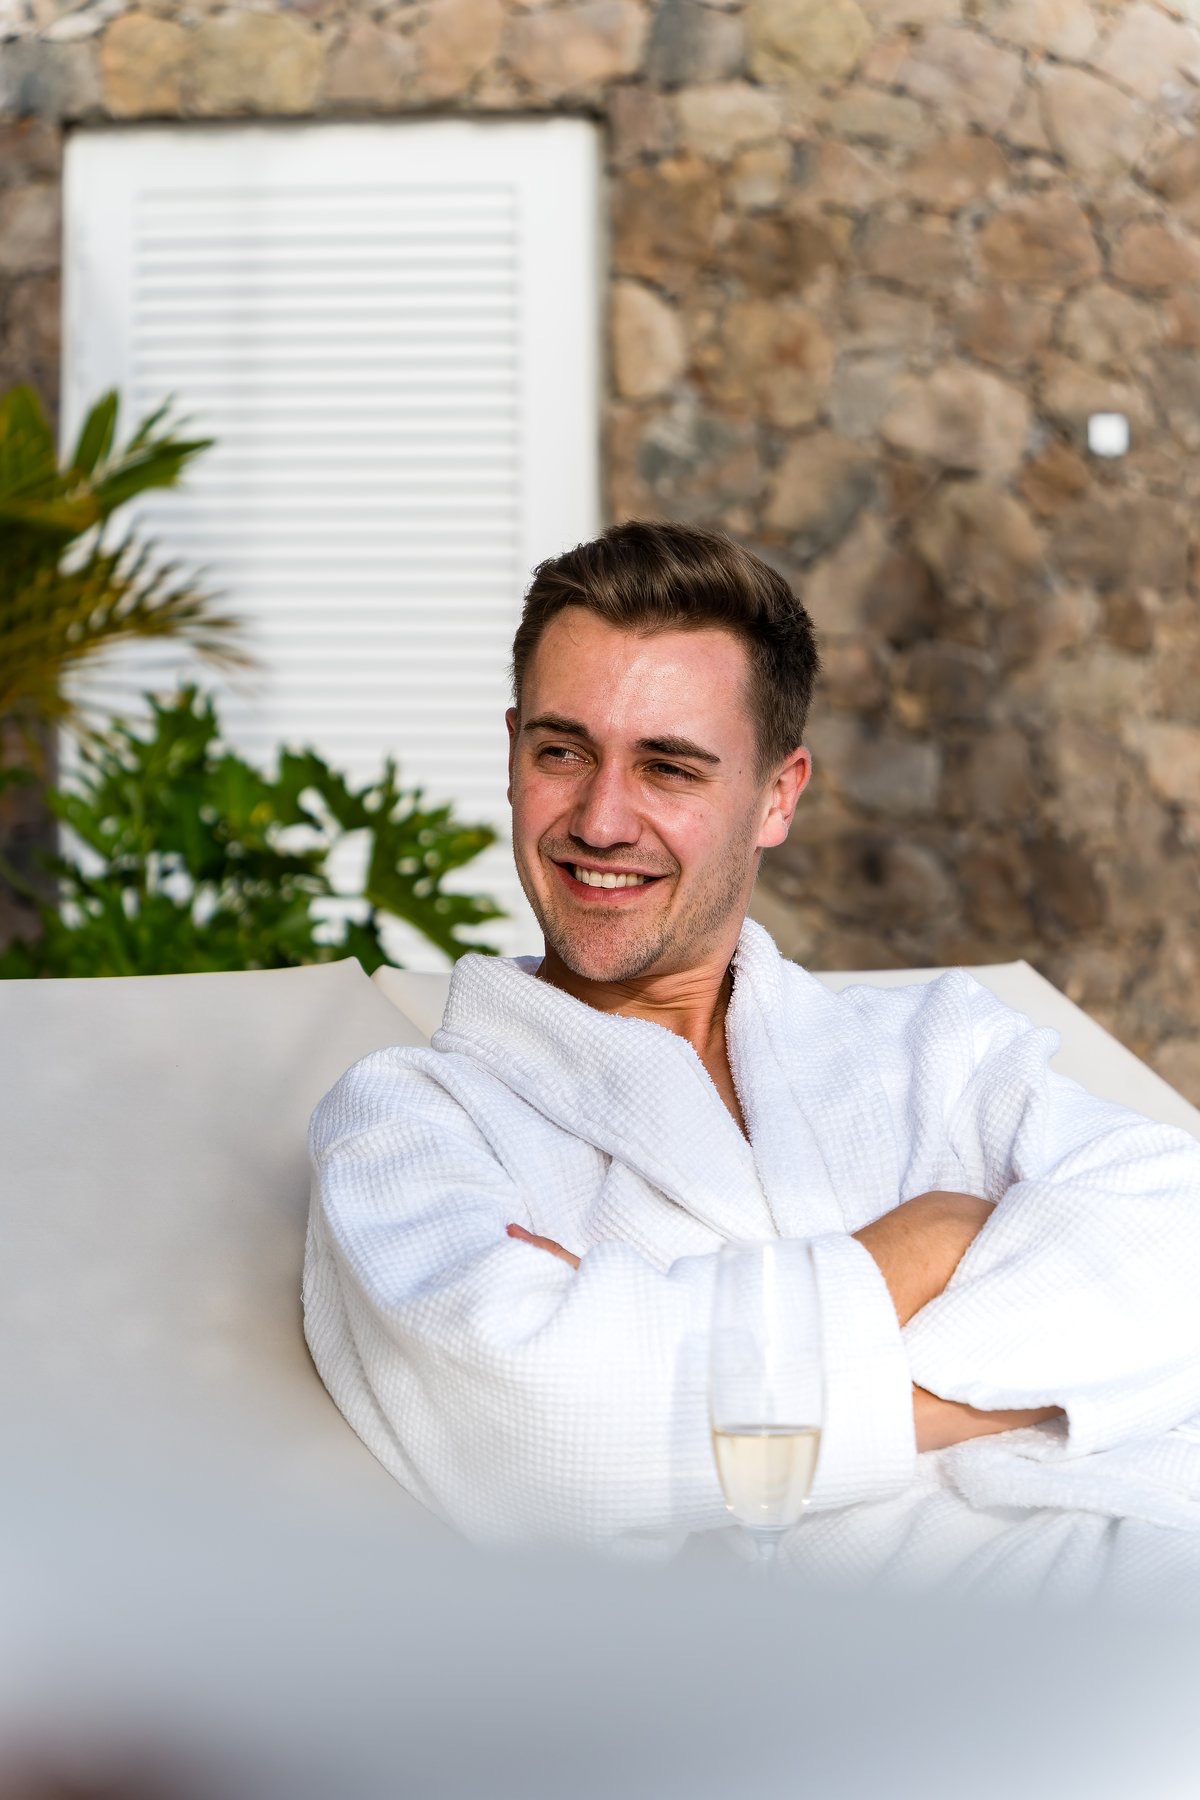
Max Haase Travel Creator
About the author

Max Haase

Travel Content Creator · Drone Photographer · Visual Storyteller

Since over 10 years professional travel creator with over 4.2 million followers. Specializing in high-end tourism board collaborations and visual travel storytelling.

4.2MFollowers
82+Countries
500+Cooperations
10+Years

Blog – Travelogues Drone footage — Image 11

DJI Mini 4 Pro Review 2026: Honest test after 2 years of practical use

Why the DJI Mini 4 Pro was my most loyal travel companion

Before I get to the DJI Mini 5 Pro Before upgrading to the DJI Mini 5 Pro, the DJI Mini 4 Pro was my main drone for two years—and I deliberately say "was," not "was," because it's still a fantastic drone. It accompanied me to over 40 countries, from the Canary Islands to New Zealand, from the Alps to the Saudi Arabian desert. Hundreds of flight hours, thousands of photos, zero crashes. This review is based on real, intensive use over two full years.

View the DJI Mini 4 Pro Fly More Combo on Amazon →

  • Weight: Only 249 grams — visa-free in almost all countries and below the EU registration limit.
  • Camera: 1/1.3-inch sensor with 48 MP photo, 4K/60fps video and D-Log M color profile for color grading.
  • Flight time: Realistically 28-31 minutes per battery, up to 34 minutes according to DJI, including omnidirectional obstacle detection.
  • Price 2026: Used Fly More Combo from around 599 Euro, new Fly More Combo from 799 Euro — successor Mini 5 Pro costs 400 Euro more.
  • For whom: Travel creators and beginners with a focus on daylight; not ideal for blue hour shooting or native 4K/100fps slow motion.

Why am I writing a review about a drone that already has a successor? Because as of 2026, the DJI Mini 4 Pro offers the best price-performance ratio of all travel drones. Since its release, the DJI Mini 5 Pro The prices of the DJI Mini 4 Pro have fallen significantly — making it an absolute insider tip for beginners and budget-conscious creators.

DJI Mini 4 Pro Technical Specifications & Price — All Specs at a Glance

Sensor: 1/1.3-inch CMOS, 48 megapixels
Video: 4K/60fps, 4K/100fps (HDR mode only), FHD/120fps
Photo: 48 MP RAW (DNG) and JPEG
Weight: 249 grams (below the EU registration limit)
Flight time: Up to 34 minutes (realistically 28-31 minutes)
Reach: Up to 20 km (O4 transmission)
Obstacle detection: Omnidirectional
Price: From around 599 euros (used), 799 euros (Fly More Combo new)

DJI Mini 4 Pro image quality: The 1/1.3-inch sensor put to the test

When DJI introduced the Mini 4 Pro, I was skeptical: Could a 1/1.3-inch sensor really deliver enough quality for professional work? The answer after two years: Yes, with limitations. In daylight and during golden hour, the Mini 4 Pro produces images that are indistinguishable from those of a Mavic 3 on social media (Instagram, TikTok, YouTube). Only when you zoom in on a 27-inch monitor do you see the difference in detail.

The sensor's strength lies in its resolution: 48 megapixels in such a small drone allow you to crop images generously. I regularly took a horizontal 48-megapixel image and cropped it to a vertical Instagram format—and the quality was still outstanding. I still use this workflow today.

Where the sensor reaches its limits: Low light. Noise becomes visible from ISO 800, and problematic from ISO 1600. Everything is fine at sunset with residual daylight—but the truly dark blue hour or even night shots are not this drone's forte. Here, the DJI Mini 5 Pro with its larger 1-inch sensor, it has a clear advantage.

Video quality: More than enough for social media

The 4K/60fps video recording is sharp and detailed. The D-Log M color profile gives you plenty of flexibility for color grading in post-production, and the result looks professional. I've used it for tourism board collaborations in Colombia and Morocco, and no client has complained about the quality.

The Mini 4 Pro's slow-motion capability is more limited than its successor: 4K/100fps is only available in HDR mode (with reduced dynamic range), and the native 4K/60fps can only be slowed down to 40 percent, which isn't always sufficient for the typical cinematic slow-motion effect. FHD/120fps works, but the loss of quality is noticeable on large screens when watching Full HD.

What positively surprised me about the Mini 4 Pro was the electronic image stabilization (EIS) in combination with the 3-axis gimbal, which produces incredibly smooth footage. Even in moderate winds (force 3-4), there's no shaking or jerking in the image. DJI's gimbal quality is outstanding across all models—this was already the case with the Mavic Pro and hasn't diminished since.

DJI Mini 4 Pro range & flight characteristics: OcuSync 4 review

The Mini 4 Pro uses DJI's O4 transmission system with a theoretical range of 20 kilometers. In practice, I never fly further than 2-3 kilometers, but the strong connection is evident in the signal quality: Even in cities with dense Wi-Fi traffic, I experienced significantly fewer connection drops with the Mini 4 Pro than with the Mini 3 Pro before it.

Omnidirectional obstacle detection was the major revolution with the Mini 4 Pro. The Mini 3 Pro could only see forward, backward, and downward—it didn't detect obstacles from the sides. The Mini 4 Pro sees in all directions and automatically warns or brakes. In practice, this saved me from a collision at least five times, especially when flying backward in tight spaces.

The only time you notice the drone's light weight of just 249 grams is in its flight characteristics in windy conditions. At wind force 5, the Mini 4 Pro struggles noticeably, and the battery drains significantly faster. My personal limit is wind force 4—I only fly above that if the location is truly exceptional and I can assess the risk.

DJI Mini 4 Pro Battery & Flight Time: Is 34 Minutes Really Enough?

DJI claims a flight time of 34 minutes. In practice, I get 28 to 31 minutes, which is absolutely respectable for a sub-250-gram drone. For comparison, the Mini 3 Pro managed around 25 minutes in real-world conditions, and the Mini 5 Pro around 35 minutes. The difference to the Mini 5 Pro might sound small, but over a full day of shooting with three to four batteries, that adds up to 15 to 20 minutes of extra flight time—which can mean an entire additional video spot.

My tip: Charge the batteries overnight using the charging hub from the Fly More Combo. The hub charges the batteries sequentially (not simultaneously), but takes about 90 minutes for all three. In the morning you'll have three fully charged batteries for the day.

DJI Mini 4 Pro vs DJI Mini 5 Pro 2026: Is it still worth buying?

Absolutely — and here's why. Since the release of the Mini 5 Pro, the prices of the Mini 4 Pro have dropped significantly. You can get the Fly More Combo new for around €799, and used in good condition from €599. For that price, you get a drone with omnidirectional obstacle avoidance, 4K/60fps video, 48-megapixel photos, and weighing under 250 grams. Show me another drone that offers all that at this price — there isn't one.

Who would particularly benefit from the Mini 4 Pro? Beginners looking to buy their first serious drone. Travelers who primarily fly in daylight. Content creators on a budget who still want professional results. Photographers using the drone to complement their ground-based camera. And anyone who can't or doesn't want to justify the €400 price difference compared to the Mini 5 Pro.

Who shouldn't buy the Mini 4 Pro? If you regularly fly in low light (blue hour, twilight), if you need professional slow-motion footage (4K/100fps in standard format), or if you deliver maximum image quality for paid client projects. In these cases, the extra cost of the Mini 5 Pro is worthwhile.

View the DJI Mini 4 Pro Fly More Combo on Amazon →

My favorite shots with the DJI Mini 4 Pro

In two years, I've taken some of my most cherished drone shots ever with the Mini 4 Pro. The sunrise over the dunes of Maspalomas on Gran Canaria—the golden line between desert and ocean, from a height of 120 meters. The volcanic landscape of Lanzarote at sunset, where every crater casts long shadows. The coastal cliffs of the Algarve with their turquoise bays, which look like precious gems from above.

And then there was the flight over the levadas in Madeira—narrow irrigation channels that wind through dense laurel forests. From below, you see only walls of green, but from above, a pattern of water, forest, and clouds unfolds, almost surreal. That was the moment I understood why drone footage is so fascinating: it shows you familiar places from a perspective your brain has never seen before.

DJI Mini 4 Pro weaknesses: What DJI could do better

Low-light performance: The 1/1.3-inch sensor reaches its limits in low light. Noise becomes visible from ISO 800, and from ISO 1600 it becomes problematic for professional use. The Mini 5 Pro performs noticeably better in this regard.

No true 4K/100fps slow motion: The 100fps resolution is only available in HDR mode, which limits the dynamic range and isn't well-suited for color grading. For true cinematic slow motion, you'll need the successor.

O4 vs. O5 transmission: In most situations, you won't notice any difference. In cities with a lot of mobile network traffic (Barcelona Old Town, Tokyo Shibuya), I occasionally experienced brief picture interruptions with O4—not dramatic, but noticeable.

Battery life in winter: At temperatures below 5 degrees Celsius, battery life drops by approximately 20-30 percent. In the Alps in February, I only got about 22 minutes of runtime per battery. Tip: Warm the batteries in your jacket pocket and insert them just before starting.

No adjustable aperture: As with the Mini 5 Pro, the aperture is fixed here too — at f/1.7. ND filters are mandatory in bright sunlight.

DJI Mini 4 Pro Fly More Combo: My accessory setup put to the test

I spent over two years putting together the perfect accessory setup:

ND filter set from Freewell (ND8, ND16, ND32, ND64) — approximately 45 euros. I use these filters on every flight in sunny weather. The ND32 is my most frequently used filter.

Landing pad A landing pad (around €15) — sounds silly, but it's essential. On sand, grass, or gravel, the Mini 4 Pro kicks up enough dust during takeoff and landing to dirty the gimbal. A foldable landing pad with a 55 cm diameter fits in any bag and solves the problem.

Propeller Guard Propeller guard (around €25) — I only use it when flying indoors (hotels, villas for real estate content). Outdoors, they are unnecessary and reduce flight time by about 3-4 minutes.

USB-C to Lightning cable — if you're still using an older iPhone. The DJI RC 2 remote controller has USB-C, while many smartphones still use Lightning or Micro-USB.

My conclusion: The best introduction to the world of drones

The DJI Mini 4 Pro is the drone I can unconditionally recommend to any beginner or traveler. It's light enough to fly legally in almost any country, small enough to fit in any bag, and good enough to deliver professional results—at least in daylight. Its current price of around €599–€799 makes it the unbeatable price-performance winner among travel drones.

Is it the best travel drone? Not anymore, not since the Mini 5 Pro came along. But it is the best travel drone for the money. And that counts for more than a marginal difference in quality that only pixel peepers on a calibrated monitor can detect.

My rating: 8.5 out of 10. In 2024 it would have been 9.5 — but the successor has raised the bar, and the sensor's low-light performance is no longer up to date. For everything else: fantastic.

Buy the DJI Mini 4 Pro on Amazon →

Frequently Asked Questions (FAQ)

Can I use the DJI Mini 4 Pro for professional work?

Yes, as long as you're mainly flying during daylight and golden hour. I've used the Mini 4 Pro for tourism board collaborations in Colombia, Morocco, and the Canary Islands—no client complained about the quality. For professional low-light work (evening events, architecture at night), however, I would opt for the Mini 5 Pro or a Mavic.

How long does the DJI Mini 4 Pro last with intensive use?

My drone has lasted over two years and an estimated 400-500 flights without any problems. DJI builds extremely robust drones—mechanically, there are hardly any issues with these mini-drones. The typical "death" of a drone is always a crash, not wear and tear. If you fly carefully and keep obstacle avoidance activated, the drone will easily last three to five years.

Are there still firmware updates available for the DJI Mini 4 Pro?

As of 2026, DJI is still providing firmware updates for the Mini 4 Pro. The drone has only been on the market since the end of 2023 and still has at least two to three years of software support ahead of it. DJI is more reliable with firmware maintenance than most tech companies—even the Mavic Air 2 from 2020 still receives occasional updates.

DJI Mini 4 Pro or DJI Mini 4 Pro with DJI RC 2?

I recommend the version with DJI RC 2 remote control (with a built-in screen). Yes, it's about €150 more expensive, but you save on your smartphone's battery, have a brighter screen that's still readable in direct sunlight, and the overall experience is significantly smoother. If you use the drone regularly, the investment is worthwhile.

What do I do if my Mini 4 Pro crashes into the sea?

Short answer: You buy a new one. Saltwater and electronics are incompatible. Therefore, my most important tip for coastal flights: Always activate Return-to-Home when the battery is low, never fly directly over water without GPS lock, and always keep enough battery reserve for the return flight. DJI Care Refresh (approximately 79 euros/year) replaces the drone in case of total loss — a worthwhile investment for coastal content creators.

Max Haase Travel Creator
About the author

Max Haase

Travel Content Creator · Drone Photographer · Visual Storyteller

Since over 10 years professional travel creator with over 4.2 million followers. Specializing in high-end tourism board collaborations and visual travel storytelling.

4.2MFollowers
82+Countries
500+Cooperations
10+Years
Advertising notice: This post contains affiliate links. If you book or buy through them, we receive a small commission—the price remains the same for you. Thanks for your support!

You might also be interested in this

Blog – Travelogues Drone footage — Image 11

How I edit my drone footage — Workflow Guide

Why your editing workflow is more important than your camera

I always say it: The best equipment is useless if you don't know how to get the most out of your footage. In eight years as a professional content creator, I've optimized, discarded, rebuilt, and optimized my editing workflow hundreds of times. What you're reading here is the result of thousands of edited drone shots—the workflow that works for me after making almost every mistake myself.

  • Selection: Of 200 drone photos taken per day, keep only 30, edit 10-15, publish 5-8 — brutally weed them out.
  • Set up: DJI Mini 5 Pro, MacBook Pro M3 Pro, Lightroom Classic for photos and DaVinci Resolve for videos.
  • Lightroom preset: Exposure +0.3, Contrast +15, Highlights -40, Shadows +30, Dynamic Range +20, Saturation +5 for D-Log M.
  • White balance: Drone images are warmed by 200-400K to counteract a blue cast; AI masks separate the sky from the foreground.
  • Video pipeline: DaVinci Resolve instead of Premiere Pro — 295 Euro one-time payment or free version instead of 24 Euro monthly subscription.

My setup: DJI Mini 5 Pro (previously DJI Mini 4 Pro), MacBook Pro 14-inch M3 Pro, Adobe Lightroom Classic for photos, and DaVinci Resolve for videos. But the software is interchangeable—the underlying principles are universal.

Phase 1: Import and Organization — The Basis for Everything

From storage medium to computer

Immediately after every flight, I import the files to my MacBook. Not in the hotel in the evening, not tomorrow, not "when I have time"—right away. The reason is simple: While the flights are still fresh in my mind, I can immediately mark the best shots and discard the rest. If I wait until the evening, the memories become blurry, and it takes me three times as long to make the selection.

My import workflow: I insert the SD card from the drone into the card reader, then import directly into Lightroom Classic using a predefined folder structure: Year, Month, Destination, Drone. A typical folder path looks like this: 2026/03-March/Albania-Tirana/DJI-Mini5Pro. During import, I immediately assign standard keywords (drone, destination, country) and a copyright watermark to the metadata.

Sorting things out: Being brutal

Of 200 drone photos taken per shooting day, I keep a maximum of 30. Of these 30, I edit 10-15, and of those, I publish 5-8. It sounds radical, but it's the difference between an amateur feed and a professional portfolio. My method: First pass in Lightroom with flags (P for Pick, X for Reject). Anything blurry, underexposed, boring, or redundant gets discarded. Second pass through the picks: stars (1-5) for quality levels. Only 4- and 5-star images are edited.

Tip: Be ruthless when selecting photos. Your feed is only as strong as your weakest image. A mediocre picture that you keep out of convenience will drag down the overall impression.

Phase 2: Photo editing in Lightroom

My standard preset as a starting point

Over the years, I've developed my own Lightroom preset that I use as a starting point for every drone shot. It's based on the DJI D-Log M color profile and does the following: Exposure +0.3, Contrast +15, Highlights -40, Shadows +30, Whites +10, Blacks -15, Vibrance +20, Saturation +5. This gives the flat D-Log images a natural look without making them oversaturated or "Instagram-filtered.".

From this starting point, I adjust each image individually. Every lighting situation is different, every destination has its own color palette. A sunset in the desert requires different adjustments than a misty morning over the levadas in Madeira.

The three most important adjustments

1. White balance: Drone footage often has a slight blue cast, especially under clear skies. I manually adjust the white balance—typically 200-400K warmer than the automatic setting. This gives landscapes a warmer, more inviting feel. The exception is blueish moods (fog, winter, night), which I deliberately keep cool.

2. Rectification and Horizon: Even if the gimbal of DJI Mini 5 Pro Despite excellent stabilization, the horizon isn't always perfectly straight. In Lightroom, I use the Transform tool with the "Horizontal" option—one click and the horizon is perfectly aligned. For architectural shots, I also correct converging lines caused by the drone's wide-angle lens.

3. Local adjustments (masks): Lightroom's killer feature for drone photography. With AI masks, I can edit the sky separately from the foreground. In practice, I do this with 80 percent of my drone photos: darkening and desaturating the sky slightly (for a dramatic effect), brightening the foreground, and sharpening details. The difference between global editing and editing with local masks is striking.

Sharpening and noise reduction

Drone photos need more sharpening than images from a full-frame camera because the smaller sensor captures less detail. My settings: Sharpening at 60, Radius 1.0, Detail 35, Masking at 50 (to prevent noise in uniform areas like the sky from being sharpened as well).

Since 2024, I've been using Lightroom's AI-based noise reduction for image processing. It's not necessary at ISO 100-200 (the drone usually uses ISO 100), but it makes a noticeable difference when shooting in twilight at ISO 400-800. The AI removes noise without destroying details—something that wasn't possible with traditional noise reduction.

Phase 3: Video editing in DaVinci Resolve

Why DaVinci Resolve and not Premiere Pro?

Three reasons: First, DaVinci Resolve is already extremely powerful in its free version—and I don't mean "usable for beginners," but "professionally usable." Color grading, editing, audio—it's all there. Second, Resolve's color grading is unparalleled. Third: no monthly subscription fee. Premiere Pro costs around €24 per month. DaVinci Resolve costs a one-time fee of €295 for the Studio version (or €0 for the free version). After a year, DaVinci has paid for itself.

My video editing workflow step by step

1. Import and inspection (cut page): I import all clips into the Media Library and review them in the Cut Page. Here I use JKL shuttles (J for reverse, K for stop, L for forward) — it's ten times faster than scrubbing through the timeline with the mouse. I mark good clips with "In" and "Out" markers.

2. Rough Cut (Edit Page): I drag the selected clips into the timeline and arrange them in the correct order. With drone videos, I pay particular attention to the rhythm: slow, flowing shots require longer clips (5-8 seconds), while dynamic flybys need shorter ones (2-4 seconds). For a typical 30-60 second Instagram reel, I use 8-15 clips.

3. Color Grading (Color Page): This is where the magic happens. For D-Log M footage from the DJI Mini 5 Pro, I always start with the DJI LUT (Look-Up Table) as a base and then adjust it manually. My typical workflow: First, the primary correction (exposure, contrast, white balance), then secondary correction (qualifiers for sky, water, vegetation), and finally a creative LUT or manual adjustment for the desired look.

4. Speed Ramping: For cinematic drone videos, speed ramping is my most frequently used stylistic device. The drone flies slowly towards an object, then the video suddenly speeds up and slows down again. In Resolve, this is achieved using the Retime Curve—right-click on the clip, select "Retime Controls," and then set keyframes for speed changes. The effect is subtle, but it gives the video a professional, cinematic feel.

5. Music and Sound Design: Drone videos need music—the drone's hum alone isn't enough to create a good atmosphere. I use Artlist (around €200 per year, Unlimited License) for royalty-free music. The music dictates the editing rhythm, not the other way around. I first select the track, then I edit the clips to match the beat.

6. Export: For Instagram reels, I export in H.265, 1080×1920 (vertical), 30fps, bitrate 20 Mbps. For YouTube, I use H.265, 3840×2160, 30fps, bitrate 50 Mbps. For client deliverables, I use ProRes 422 HQ — maximum quality, which the client can then compress themselves.

Phase 4: HDR Panoramas — My Signature Style

One technique that sets my drone photos apart from many others is HDR panoramas. The Mini 5 Pro can automatically create a panorama from multiple individual shots, but I prefer the manual approach for maximum control.

My workflow: I fly the drone to the desired altitude, activate the AEB function (5 exposures per position), and then manually take a grid of 3x3 or 4x3 shots, each overlapping by approximately 30 percent. This results in 45 to 60 individual images for a single panorama.

In Lightroom, I import all the images, select the five AEB shots for each position, and create an HDR merge. Then, I select all 9-12 HDR images and create a panorama merge. The result: a single HDR panorama with approximately 200 megapixels, enormous dynamic range, and a sharpness that no single shot can achieve. I also print this panorama at 150×50 cm—and it looks razor-sharp.

My favorite LUTs and presets

Over the years, I've tested various LUT packs. My current favorites are: Peter McKinnon's LUTs for video (around €40, natural colors with a slight teal-orange bias), Sam Kolder's Color Grading Pack (around €50, very cinematic and high-contrast), and my own custom preset, which I've combined elements from both. For photos, I exclusively use my own Lightroom preset as a base and then adjust it manually—ready-made presets without adjustments almost always look overdone.

Time required: This is how long my editing takes per recording.

For a single drone photo: approximately 3-5 minutes in Lightroom. For a 30-second reel: approximately 45-90 minutes in DaVinci Resolve (including color grading and music). For a 3-minute YouTube video: approximately 4-6 hours. For an HDR panorama: approximately 20-30 minutes of editing time plus 15 minutes of rendering time.

Overall, I spend about 40 percent of my working time editing—almost exactly the same amount as actually taking photos and flying. This surprises many people, but at least half of professional content is created on the computer, not on location.

Common mistakes in drone editing — and how to avoid them

In my early years, I made almost every editing mistake imaginable. Here are the five most common ones, so you don't have to repeat them:

1. Oversaturation: The most common mistake with drone photos. The temptation is strong to crank up the colors—to make the sea even bluer, the grass even greener, the sunset even more orange. The problem: Oversaturated images immediately look "edited" and cheap. My guideline: Saturation no more than +10, Dynamic range no more than +25. Less is more.

2. Excessive HDR effects: HDR images with a visible halo effect around buildings and trees scream "amateur." Use HDR merges for greater dynamic range, but maintain a natural look. If someone says "that looks like HDR," you've overdone it.

3. Skewed horizon: It sounds trivial, but a horizon tilted by 0.5 degrees subconsciously catches the viewer's eye and makes the image look unbalanced. Always correct it, always. In Lightroom: Press R for the Crop Tool, then align it to the horizon line.

4. Uniformity instead of variation: All drone photos with the same preset, the same mood, the same editing—that gets boring quickly. Vary your looks: warm golden hour editing, cool blue hour mood, dramatic contrasts during thunderstorms, pastel mornings in the fog. Your feed thrives on variety.

5. Over-sharpening: Oversharpened drone images show unsightly artifacts at edges—especially along coastlines where water meets rocks. A sharpness setting of 60 is sufficient; anything higher becomes problematic. Always use the masking function to exclude uniform areas (sky, water) from sharpening.

My backup and archiving system

After eight years of content creation, I've amassed several terabytes of drone footage. My archiving system is simple but robust: Current projects (last month) are stored on my MacBook's internal SSD for quick access. Completed projects (2-12 months old) go to an external Samsung T7 Shield SSD, which I take with me when I travel. Long-term archives (older than 12 months) are stored on a WD My Passport 5TB HDD at home, plus a Backblaze cloud backup. I never delete RAW files—I've re-edited three-year-old RAW images several times because my skills have improved or a client needed a specific shot from an old trip.

Storage requirements per trip as a guideline: A two-week trip with 3-4 drone flights daily plus a ground camera produces approximately 150-250 GB of RAW material (photos plus video). After selection and processing, approximately 30-50 GB of final files remain. Plan your storage accordingly.

Frequently Asked Questions (FAQ)

Do you edit each image individually?

No. I work with presets as a starting point and then adjust them individually. For a series of 20 images from the same spot, I copy the settings of the first edited image to all the others and only adjust the exposure and white balance. This saves a huge amount of time. For client deliverables, I edit each image individually—for my own feed, I use a copy-paste workflow.

Which laptop is sufficient for editing 4K drone videos?

For DaVinci Resolve, I recommend at least an Apple M2 chip or a 12th-generation Intel i7, 16 GB of RAM (32 GB is better for 4K), and a dedicated GPU. My MacBook Pro M3 Pro with 18 GB of RAM handles 4K/60fps footage smoothly in the timeline. The GPU is crucial for fast rendering—DaVinci Resolve makes intensive use of it. The most affordable entry point that works is a MacBook Air M2 (around €1,200) for Lightroom photos, or a MacBook Pro M3 (around €1,800) for Lightroom plus light video editing.

Can I use the same workflow with a different drone?

Yes. The principles—flying in D-Log/Flat profile, organizing during import, working with presets as a basis, and using local masks—apply to every drone. The specific preset values change depending on the camera sensor, but the methodology is identical. This workflow also works with a DJI Air 3 or Autel EVO Lite+.

How do I back up my files when traveling?

I back up my data twice. First, on my MacBook (my main working copy), and second, on a Samsung T7 Shield SSD (2 TB, around €180), which is shockproof and waterproof. Every evening, I copy all new files to the external SSD. The MacBook and SSD are carried in separate bags—if my backpack gets stolen, the SSD is safe in my jacket pocket, and vice versa. At home, everything goes onto my main hard drive and also into the cloud.

Do I need to fly D-Log M or is the standard airfoil sufficient?

For maximum image quality and flexibility in post-production: D-Log M. For quick social media content without much editing: Normal profile. I generally fly in D-Log M and edit everything—but if you only want to make Instagram Stories and don't have time for Lightroom, the Normal profile is perfectly fine. The images look good straight from the drone.

Max Haase Travel Creator
About the author

Max Haase

Travel Content Creator · Drone Photographer · Visual Storyteller

Since over 10 years professional travel creator with over 4.2 million followers. Specializing in high-end tourism board collaborations and visual travel storytelling.

4.2MFollowers
82+Countries
500+Cooperations
10+Years
Blog – Travelogues Drone footage — Image 11

Learn to sail: Sailing license, basics & costs 2026

Learn to sail — My experience report on obtaining my RYA sailing license in Greece. In May 2023, I took the course at the Aegean Sailing School in the Greek Aegean Sea, my RYA Day Skipper I did it. A week on a sailing yacht, learning navigation, practicing maneuvers, and visiting some of the most beautiful bays in Greece. In this guide, I share my honest experiences, the cost of a sailing license, and whether it's worth it.

  • Certificate: RYA Day Skipper — internationally recognized, yacht charter available in Croatia, Greece, Thailand and the Caribbean.
  • School: Aegean Sailing School on Poros, Greek Aegean Sea, max. 5 students per group, 7 days on board including exam.
  • Cost: 1,400 Euro course fee plus flight, transfer and meals — total approx. 1,800-1,900 Euro all-inclusive.
  • Process: Days 1-2: Basics and maneuvers; Days 3-4: Navigation and nautical charts; Days 5-6: Independent skipping; Day 7: Exam.
  • Travel time: Book in May or June — warm weather, moderate Meltemi winds, early booking discounts save 100-200 euros.

Sailing had been on my list for a long time. As someone who travels the world with a drone and camera, I wanted the freedom to be out on the water myself—not as a passenger on a cruise, but as a skipper with my own boat. RYA Day Skipper is the internationally recognized entry-level certificate that allows you to charter yachts in most countries.

Why RYA in Greece?

There are sailing schools all over the world. But Greece has three unbeatable advantages:

  • Perfect conditions: Consistent winds (Meltemi in summer), little current, hundreds of sheltered bays. Ideal for studying.
  • Price-performance: An RYA Day Skipper in Greece costs approximately €1,200-1,800 — significantly more in England or the Caribbean.
  • Picture-perfect scenery: Instead of practicing in the grey Solent, you sail through turquoise bays with Greek islands on the horizon. Your motivation stays high all week.

The Aegean Sailing School The sailing school on Poros has an excellent reputation. Small groups (max. 5 students), experienced RYA instructors, and a modern fleet of yachts. My instructor was a Brit with 20 years of sailing experience in the Aegean – he knew the best anchorage in every bay.

Sailing basics: From beginner to day skipper in one week

Day 1-2: Basics. Sailing terms, knots, maneuvers (tacking, gybing), man-overboard drill. On the first day you think: "I'll never learn this." On the second day you realize: "This isn't so difficult after all."„

Days 3-4: Navigation. Reading nautical charts, planning a course, calculating tides, GPS vs. traditional navigation. We planned and navigated the course from Poros to the islands of Hydra and Spetses ourselves. Navigation at a chart table is completely different from Google Maps — but extremely satisfying when you arrive where you wanted to go.

Days 5-6: Independent sailing. Each student takes turns being the skipper. You plan the route, give the commands, and dock in the harbor. Docking is actually the most stressful part—wind, current, other boats, and 50 spectators on the dock watching as you (hopefully not) crash into the neighboring catamaran.

Day 7: Exam. Theoretical and practical exams. The theory is doable if you paid attention during the week. The practical part: You have to execute a maneuver flawlessly—docking, man-overboard, navigation. I was nervous, but I managed it.

RYA Day Skipper vs. Sport Boat License: Exam Questions & Costs

positionCostnote
Course fee1.400 €Aegean Sailing School, 7 days
Flight (e.g. Frankfurt-Athens)120-250 €Ryanair/Aegean Airlines
transfer (Athens-Poros)~30 €Ferry from Piraeus
Catering~200 €Cooking together on board + Taverna
RYA book~35 €RYA Day Skipper Handbook
IN TOTAL~1.800-1.900 €Including flight and meals
Money-saving tip: Early booking discounts (2-3 months in advance) save €100-200. And: Cooking on board is significantly cheaper than eating in the taverna every evening. We took turns — everyone cooked a bit.

Who would benefit from a sailing license?

Honest answer: Not for everyone. But absolutely for these people:

  • Travelers seeking freedom: With a sailing license you can charter a yacht in Croatia, Greece, Thailand or the Caribbean and be completely independent.
  • Content Creator: The perspectives from a sailboat are unique — and drone footage of your own yacht in a secluded bay is content gold.
  • Adventurer: Sailing is physically and mentally demanding. Night watch alone at sea, maneuvering in strong winds — these are experiences you won't forget.

Who NOT for: If you need comfort, get seasick, or simply want to be on the beach — then a hotel vacation is the better choice. On a sailing yacht, you share cramped bunks, shower with saltwater, and the "bathroom" is a toilet the size of a suitcase.

Drone on a sailboat — tips

I have my drone Had it on board all week. Drone footage of sailboats in turquoise bays — that's the stuff viral reels are made of.

My tips:

  1. Only take off/land in harbors or calm bays. The risk is too high in open water with waves.
  2. Practice hand landings. There's no flat surface on a sailboat. I land the drone by hand — it takes some practice, but it works reliably.
  3. Waterproof bag For the drone. Saltwater and electronics are not friends.
  4. Protect batteries from sunlight. Temperatures of 40°C+ on deck are normal. Overheated batteries will refuse to start.

More on this topic Flying a drone abroad You can find it in my separate guide. How I, as Sailing boat adventure I also described there how to make the best of every situation.

FAQ — Frequently Asked Questions about the Sailing License

Do I need prior knowledge for the RYA Day Skipper course?

No — the course starts from scratch. Sailing experience is helpful, but not absolutely necessary. Those who are completely new can take the preparatory course. RYA Competent Crew (5-7 days) preparatory course — recommended for those who have never been on a sailboat before. Those who are athletic, eager to learn, and open to intensive days can skip Competent Crew and start directly with Day Skipper. Recommendation: work through the basic theory (knots, navigation basics, safety rules) online before the course.

Is the sailing license valid worldwide?

The RYA Day Skipper The German sailing license is one of the most internationally recognized licenses. It is accepted as proof of competence in most charter destinations — Croatia, Greece, Turkey, Thailand, the Caribbean, Seychelles. In some countries (e.g., Croatia), you also need a local license, which you can obtain locally for a fee (approx. €80-120). SBF-See This applies internationally only to a limited extent. SKS It is accepted worldwide but significantly more complex.

How long does the RYA Day Skipper course last?

The practical part usually lasts 5-7 days on the boat — usually Saturday to Saturday. You can learn the theory on-site or complete it online beforehand (RYA Day Skipper Theory approx. 40 hours). Those who complete the theory and practical training in a compact format will be finished after 2 weeks. The assessment is conducted continuously on board by the instructor — not a traditional exam situation.

What is the total cost of the certificate, including travel?

Rough calculation: Course price €1,200-1,600 (depending on school, boat, season), Flight €200-400 (Greece from Germany), Port fees and provisions €150-300 per person, occasionally Local marina surcharges €50-100. The total realistic cost is €1,600-€2,500. Compared to the German SKS (which often costs €3,000-€4,000 plus several weekends of preparation), the RYA Day Skipper in Greece offers extremely good value for money.

Can I charter a yacht immediately after the course?

Theoretically, yes — the Day Skipper is designed precisely for that. Practically speaking, I recommend first... 2-3 trips as co-skipper Sailing with experienced sailors is advisable before taking sole responsibility for the boat, crew, and guests. Night sailing, strong winds above force 5, and tight harbor maneuvers, in particular, require routine. Many charter companies also require a Sailing Summary with completed nautical miles — usually at least 300 nautical miles as crew before the first bareboat charter.

What happens if the weather is bad during the course?

You'll still sail—within safe limits. Sailing in rough weather is an essential part of the training: reefing, heavy weather maneuvers, man-overboard drills in windy conditions. Only in truly dangerous conditions (storm warning, heavy seas) will you remain in port for theory and boat handling. Good schools schedule courses from mid-May to mid-October anyway, when the Greek Aegean Sea is relatively stable.

What level of physical fitness do I need?

No need for elite sports levels, but basic fitness is a huge help. A yacht is constantly in motion; sails need to be hoisted, and setting and raising the anchor requires strength. Anyone who can't manage stairs without stopping or has severe back problems should seriously consider this before booking. Seasickness isn't a deal-breaker—most people get used to it within the first two to three days with some preventative measures (light meals, keeping an eye on the horizon, and possibly medication like Vertigoheel or scopolamine patches).

Are there age restrictions?

Officially from 16 years For the Day Skipper course—those under 18 often require parental consent. There's no upper age limit: in my course, participants ranged from 28 to 63 years old, and the most experienced sailors on other boats were sometimes over 70. What matters is a willingness to learn and fitness, not age.

How does the accommodation work during the course?

You sleep on board — This is part of the training and saves costs. Typical day skipper yachts have 3-4 cabins plus a saloon berth; usually 4-6 course participants share the accommodation with the instructor. A galley, shower, and toilet are on board, but small. Don't expect hotel comforts — but you'll wake up in a different bay every morning.

What happens after the certificate? Can I... Coastal Skipper or Yachtmaster Connect?

Yes — the RYA course chain builds logically upon itself: Day Skipper → Coastal Skipper → Yachtmaster Offshore → Yachtmaster Ocean. Directly after the Day Skipper course, you can Collecting nautical miles (approx. 800 for Coastal Skipper, 2,500 for Yachtmaster), complete night sailings and register for the Coastal Skipper course — usually 1-2 seasons later. Yachtmaster is demanding (navigation, exam with an RYA examiner) and opens up commercial charter options.

My conclusion

The week on the sailboat was one of the best investments I've made in my freedom to travel. For under €2,000, I got a license that allows me to charter yachts worldwide. The combination of sailing and drone photography opens up content opportunities you'd never get as a regular tourist.

If you're considering it: Do it in Greece, do it in May or June (warm weather, moderate winds), and do it with a small, personal school. You won't regret it.

Max Haase Travel Creator
About the author

Max Haase

Travel Content Creator · Drone Photographer · Visual Storyteller

Since over 10 years professional travel creator with over 4.2 million followers. Specializing in high-end tourism board collaborations and visual travel storytelling.

4.2MFollowers
82+Countries
500+Cooperations
10+Years
Blog – Travelogues Drone footage — Image 11

Porto travel report: Sights, old town & insider tips

postage Porto surprised me. To be honest, I'd expected Lisbon to be Portugal's coolest city—and dismissed Porto as just a "nice stopover." What a mistake. After three days in Porto, it was clear: this city is a diamond in the rough. Rawer, more authentic, and more photogenic than Lisbon, with an energy you can feel immediately.

  • Duration: 3 days are enough for the old town and Gaia, 5 days with Braga and Peneda-Gerês National Park as day trips.
  • Port wine: Graham's Premium Tasting 15 Euro with panoramic view; Taylor's and Sandeman in Vila Nova de Gaia as top alternatives.
  • Livraria Lello: Entry is 8 euros with credit towards book purchases — be there at 9:00 am, before the 9:30 am rush of selfie sticks.
  • Cost: Budget 50-80 euros per day, hotel from 70 euros — around 30 percent cheaper than Lisbon at a comparable level.
  • Bom Jesus: The 116-meter Baroque staircase in Braga can be reached in 20 minutes via the historic water lift from 1882 or on foot.

In March 2024, I explored Porto and its surroundings with a drone and camera—from the narrow streets of the Ribeira district to the iconic port wine cellars and the UNESCO World Heritage Site of Bom Jesus do Monte in Braga. In this travelogue, I share my highlights, insider tips, and all the practical information you need for your Porto trip.

Porto Old Town: UNESCO World Heritage Site with character (sights)


Porto's old town (Ribeira) is a UNESCO World Heritage Site—and it shows. The colorful, slightly dilapidated houses are stacked on the steep slopes above the Douro River, connected by narrow alleys, steep staircases, and hidden squares. It's chaotic, loud, vibrant, and absolutely wonderful.

Unlike Lisbon's Alfama, which has become heavily gentrified, the Ribeira still retains its authentic local character. Laundry hangs over the alleys, street musicians play on every corner, and locals sit alongside tourists in the small tascas (taverns).

Must-see in the old town:

  • Dom Luís I Bridge: The iconic double-decker bridge. Walk on the upper deck for panoramic views, on the lower deck for photos at river level.
  • Cais da Ribeira: The waterfront promenade with its colorful houses — THE photo opportunity of Porto
  • São Bento train station: The entrance hall features 20,000 hand-painted azulejo tiles. One of the most beautiful train stations in the world.
  • Carmo Church: The facade completely covered with blue azulejos — breathtaking in sunshine
  • Torre dos Clérigos: The bell tower offers the best 360° view over the city (240 steps, well worth it)

Porto's insider tips: Vila Nova de Gaia & Port wine cellars


On the other side of the Douro lies Vila Nova de Gaia — the mecca for port wine fans. Dozens of cellars store their barrels here, and almost all offer tours with tastings.

My top 3 wineries:

Graham's: My favorite. Located slightly higher up, with a terrace and panoramic views over Porto and the Douro, which alone are worth the visit. The premium tasting tour (€15) is excellent—you learn the difference between Ruby, Tawny, and Vintage Port.

Taylor's: The largest and most famous winery. Impressive barrel cellars, good audio guide system, great tasting on the rooftop terrace. Admission €15–20.

Sandeman: The one with the man in the black cloak. Theatrically staged tour, but the vintage ports are excellent. From €12.

Tip: Go in the late afternoon when the light over Porto turns golden. A bottle of Tawny Port on the terrace at sunset — it doesn't get any better than that.

Livraria Lello — The most beautiful bookstore in the world?


Livraria Lello is often called the "most beautiful bookstore in the world" — and the ornate staircase, Art Nouveau wood carvings, and colorful glass roof are indeed impressive. J.K. Rowling is said to have found inspiration for Harry Potter here (she lived in Porto in the 1990s).

Entry: €8 (credited towards book purchase). Worth a visit in the morning if you want to photograph the stairs without 50 selfie sticks. Opens at 9:30 — arrive at 9:00.

Day trip: Braga & Bom Jesus do Monte


55 minutes north of Porto Braga — and the breathtaking pilgrimage site Bom Jesus do Monte. The baroque staircase, which winds its way 116 meters up the hill, is one of Portugal's most iconic buildings and a UNESCO World Heritage Site.

Bom Jesus looks even more spectacular from the drone: the white staircase, nestled in dense green forest, with the basilica as its crowning glory—a truly unforgettable sight. My drone photo of Bom Jesus is one of my absolute favorite pictures from Portugal.

You can walk up the stairs (about 20 minutes, good for fitness) or take the historic water lift — one of the oldest hydraulic lifts in the world, in operation since 1882.

Braga itself It's a charming university town with a lively old town, affordable restaurants, and the oldest cathedral in Portugal. Perfect for a half-day trip.

Day trip: Peneda-Gerês National Park


Portugal's only national park lies 1.5 hours northeast of Porto and is a completely different Portugal. Instead of coast and cliffs: granite mountains, waterfalls, turquoise reservoirs and sleepy granite villages that look as if nothing has changed in 200 years.

The Cascata do Arado and the Cascata da Portela do Homem These are the most spectacular waterfalls. The bridges over the reservoirs offer drone views reminiscent of New Zealand — turquoise water surrounded by green mountains.

Gerês is perfect for a day trip or—even better—for an overnight stay in one of the quintas (country houses). The peace and quiet after the hustle and bustle of Porto is therapeutic.

Food in Porto — Frangesinhas and more


Porto is one of the best food cities in Europe — and one of the most affordable. Its culinary identity is down-to-earth, meat-heavy, and absolutely delicious.

Must-Eat:

  • Francesinha: The Porto dish. A sandwich monster made of toast, ham, steak, and sausage, topped with cheese and drowned in beer and tomato sauce. Sounds crazy, tastes amazing. Best place to eat it: Café Santiago (€8–12)
  • Bacalhau à Gomes de Sá: Salt cod gratin with potatoes, onions and olives — Porto's Comfort Food
  • Pastel de Nata: Not just Lisbon! Porto has great pastéis — Manteigaria is excellent.
  • Bifana: Thin pork sandwich with mustard. Sounds simple, but it's addictive. From €2.50

Restaurant recommendations:

  • Cantina 32: Modern Portuguese food in a cool industrial atmosphere
  • O Paparico: Fine dining, Portuguese style — if you want to treat yourself
  • Casa Guedes: The city's most famous Bifana. The queue is worth it.
  • Mercado do Bolhão: The historic market — freshly renovated, great street food

Porto with my drone — My best spots


Porto is a drone paradise — with limitations. The old town is located in a no-fly zone (near the hospital), but there are some legal spots with spectacular results:

  • Jardim do Morro (Gaia side): Drone over the Douro with Porto skyline — the classic motif
  • Foz do Douro: Where the Douro meets the Atlantic. Coast, lighthouse, surf.
  • Bom Jesus do Monte (Braga): The staircase from above — absolutely stunning!
  • Peneda-Gerês: Reservoirs and mountains — no restrictions in the national park (but respectful treatment of nature!)

Always observe EU drone regulations and check the DJI app (geofencing) before flying. More details in my Drone Guide.

Porto at a glance: Getting there, travel time, budget & safety


ThemeDetails
ArrivalPorto Airport (OPO), Metro directly to the city center (€1.50, 30 min)
Best Travel TimeMay–June and September. Hot summers, mild but rainy winters.
transportOld town on foot. Metro for more distant destinations. Rental car only for excursions.
Budget/day€50–80 (accommodation + food + activities) — noticeably cheaper than Lisbon
Length of stayMinimum 3 days (city + Gaia). 5 days including Braga and Gerês.
SecurityVery safe. Normal caution is advised regarding pickpockets in tourist areas.

FAQ — Frequently Asked Questions about Postage

Is Porto better than Lisbon?

Different. Porto is smaller, rougher, more authentic, and cheaper. Lisbon is bigger, more cosmopolitan, and has a better nightlife. For a first trip to Portugal: ideally, combine both. If I had to choose just one city: Porto.

How many days will it take for postage?

Minimum 3 full days. Including Braga, Gerês and the Douro Valley: 5–6 days. Porto is also worth a long weekend.

Is postage expensive?

No. One of the best value-for-money options in Western Europe. A full meal with wine: €15–25 per person. Accommodation from €30–40 per night for a double room.

Is it possible to explore Porto on foot?

Yes — but with a caveat: Porto is extremely hilly. Good shoes are essential. Alternatively: the historic tram (Line 1) or Uber for steep sections.

Do I need the Porto Card?

Only if you're planning to visit many museums and attractions. For most travelers, it's not worth it—the best experiences in Porto are free (old town, bridge, riverfront, azulejos).

Max Haase Travel Creator
About the author

Max Haase

Travel Content Creator · Drone Photographer · Visual Storyteller

Since over 10 years professional travel creator with over 4.2 million followers. Specializing in high-end tourism board collaborations and visual travel storytelling.

4.2MFollowers
82+Countries
500+Cooperations
10+Years

You might also be interested in this

Blog – Travelogues Drone footage — Image 11

India travel report: Rajasthan tour, visa & entry requirements

India Travelogue — Rajasthan, Taj Mahal & the most beautiful chaos in the world

My India TravelogueIndia is not a country. India is a continent encased in a nation. 1.4 billion people, 22 official languages, temperatures ranging from -40°C in the Himalayas to +50°C in the Thar Desert, and a chaos that either breaks your heart or wins it over. For me, it did both—simultaneously.

  • Route: 3 weeks Golden Triangle plus Rajasthan: Delhi, Agra, Jaipur, Jodhpur, Jaisalmer, Udaipur, Pushkar, back to Delhi.
  • Taj Mahal: Book your ticket online at East Gate for approximately €15, arrive at 5:30 am — 90 minutes almost alone in the golden morning light.
  • Jaipur: Amber Fort as the most spectacular palace, Sheesh Mahal mirror hall; Nahargarh Fort for sunset over the Pink City.
  • Desert safari: Night in the Thar Desert near Jaisalmer — camel ride, overnight stay in the dunes, Milky Way at ISO 3200 and 25 second exposure.
  • Travel time: November to February: 15-25 degrees during the day, down to 5 degrees at night in the desert; summer with 50 degrees absolutely impossible.

I spent three weeks traveling in northern India, mainly in Rajasthan and Uttar Pradesh. My route was: Delhi → Agra → Jaipur → Jodhpur → Jaisalmer → Udaipur → Pushkar → Delhi. The "Golden Triangle" plus an extension into Rajasthan. And I'll say it straight away: India is the most intense travel destination I've experienced in over 60 countries. Not the most beautiful, not the easiest—but the most intense.

Entering India: Delhi & the first culture shock

You land at Indira Gandhi International Airport, take a prepaid taxi (counter in the arrivals hall, fixed price, no haggling), and then Delhi hits you like a wall. Honking. Honking everywhere. Cows in the road. Rickshaws driving the wrong way. The smell of spices, exhaust fumes, and incense all at once. And in the middle of it all, people—people everywhere, in a density you can't imagine until you've experienced it.

Old Delhi — Chandni Chowk

Chandni Chowk is Delhi's oldest and most chaotic market. The alleyways are so narrow that two rickshaws can't pass each other. Spice vendors, sweet shops, fabric merchants, jewelry, electronics—everything jumbled together, all at once. The smell of freshly fried jalebi (a sweet, spiral-shaped pastry that's dipped into hot oil right before your eyes) haunted me for three days.

Photographically, Chandni Chowk is both a nightmare and a paradise. camera The 35mm lens was my best friend—street portraits, details, capturing the chaos. The drone? Forget it. Too cramped, too crowded, too many cables. Street photography is all that matters here.

Red Fort and Jama Masjid

The Red Fort (Lal Qila) is the former residence of the Mughal emperors—a massive red sandstone complex covering 254 hectares. Opposite it, the Jama Masjid is India's largest mosque, with room for 25,000 worshippers. From the minarets (35 rupees extra, about €0.40), you have the best view of Old Delhi. But be warned: the stairs in the minarets are narrow, steep, and dark. Claustrophobes should stay below.

Agra — The Taj Mahal and the disillusionment that followed

The Taj Mahal. The building everyone knows, the one everyone has a photo of, and yet—despite everything—it still takes your breath away the first time you see it in person. I was at the East Gate at 5:30 a.m. (buy your ticket online the day before, about €15 for foreigners), went through the main gate, and there it is: white marble shimmering pink in the morning light, perfect symmetry, the quartet of minarets, the reflecting pool in front.

I had almost 90 minutes to myself—until around 7:30 a.m. when the tour groups arrived. During this golden hour, I took photos that require no post-processing. The Sony A7 IV with the 16-35mm lens for the wide-angle view, the 70-200mm for details of the marble inlays (Pietra Dura—semi-precious stones inlaid in white marble). The drone? Absolutely forbidden at the Taj Mahal. And rightly so—the place deserves silence, not buzzing.

The sobering reality: The rest of Agra is… not beautiful. The city lives off Taj Mahal tourism and little else. Agra Fort is worth seeing (Mughal architecture, view of the Taj Mahal across the Yamuna River), but the city itself is loud, dusty, and exhausting. My advice: Taj Mahal in the morning, Agra Fort in the afternoon, train to Jaipur in the evening.

Jaipur — The Pink City

Jaipur was my favorite in Rajasthan. The entire old city is painted a warm terracotta pink (since 1876, when Maharaja Ram Singh had the city painted pink in honor of Prince Albert's visit). The result: a city that glows with golden light at sunrise and sunset and simply looks fantastic in photos.

Amber Fort

Eleven kilometers outside Jaipur, perched on a hill overlooking Maota Lake, Amber Fort is the most impressive palace I've seen in Rajasthan—a blend of Hindu and Mughal architecture, featuring a mirrored hall (Sheesh Mahal) that creates thousands of reflections by candlelight. The 20-minute hike to the fort is well worth it—from the top, I flew my drone over the lake and the surrounding hills. The fortress walls, stretching like the Great Wall of China, the pink of the city in the background, the lake as a mirror—these are images that go viral on Instagram.

Hawa Mahal

The "Palace of Winds"—a five-story pink sandstone facade with 953 small windows through which the women of the court could observe street life without being seen themselves. From the front, it's an iconic Instagram shot; from the back, rather underwhelming (it's really just a facade). Best photo spot: From the "Wind View" café opposite—rooftop terrace, chai, and the Hawa Mahal directly in front of the lens.

Nahargarh Fort at sunset

My insider tip for Jaipur: Nahargarh Fort towers above the city and offers the best sunset view over the Pink City. Fewer tourists than at Amber Fort, and the light at sunset—the whole city bathed in pink and gold—is the most photogenic moment Jaipur has to offer. Chai wallah at the top, sunset, drone flying over the city—a perfect evening.

You might also be interested in this

Blog – Travelogues Drone footage — Image 11

Abu Dhabi travel report: Rixos Marina Resort, Louvre & desert luxury

Abu Dhabi Travel Report – Rixos Marina Bay Resort as a Basecamp for City, Culture and Desert

Abu Dhabi is a surprise. While Dubai flaunts its glitz and superlatives, the neighboring emirate takes a more subtle approach: cultural depth, architectural masterpieces, and a coastline that is significantly quieter and more elegant than the hustle and bustle of its neighbor. For my four-day research trip, I visited... Rixos Marina Abu Dhabi We chose a base camp right on the water – and this article primarily tells the story of this resort, supplemented by the most important points about the Louvre Abu Dhabi, Sheikh Zayed Grand Mosque and a side trip to the Liwa Desert.

  • Rixos Marina Abu Dhabi: Premium 5-star resort directly on the marina; balcony suites with water views, several à la carte restaurants, infinity pool and private beach access – ideal as a central basecamp for the city.
  • Cultural highlights: Louvre Abu Dhabi (Jean Nouvel's dome made of 7,850 stars, €16 entry) and Sheikh Zayed Grand Mosque (free, 82 domes, 1,000 columns, world's largest hand-knotted carpet).
  • Liwa Desert: 200 km south, dunes up to 300 m high – day trip or overnight tour from about 200 euros, luxury option Qasr Al Sarab from 500 euros per night.
  • Budget: Rixos stays from around 350 euros per night including breakfast; mid-range daily budget 120-200 euros; Friday brunch in top hotels 50-80 euros – an absolute must-do experience.
  • Travel time & entry: November to March is ideal (45-50 degrees in summer); Germans receive a free 90-day visa at the airport.

Rixos Marina Abu Dhabi – My basecamp for four days

The Rixos Marina Abu Dhabi Located directly on the Al Bateen Marina waterway, a ten-minute drive from the Emirates Palace and fifteen minutes from the Grand Mosque, the resort boasts a clean, modern design: contemporary lines, warm wood tones, and waterfront views throughout. It avoids an overly ornate oriental style, instead offering understated luxury – precisely what defines Abu Dhabi as a destination.

Check-in was straightforward, and the service was noticeably better than in many comparable 5-star hotels in the region. My room: a junior suite on the upper floor with a French balcony overlooking the marina, a king-size bed, a separate living area, and a marble bathroom with a rain shower and freestanding bathtub. At night, you can faintly hear the water lapping against the pontoons – perfect after a day of sightseeing.

Rooms and suites

The room selection ranges from Deluxe Rooms (from around €350 per night) to Junior and Executive Suites, all the way up to the Presidential Suite. All rooms have a balcony with a water view – this is the architectural heart of the resort. I would always book at least the Junior Suite: the extra space and the larger terrace are worth the extra cost, especially if, like me, you're staying for a few days and also work or edit content on the balcony in the evenings.

Culinary delights at Rixos Marina

The resort boasts several high-quality restaurants. There's a breakfast buffet with Arabic, Asian, and European stations, à la carte options for lunch and dinner, and a pool bar for light snacks and drinks throughout the day. I particularly remember the seafood tasting one evening – the quality would have easily rivaled that of any major European restaurant, at roughly half the price.

Pool, beach and wellness

The infinity pool stretches along the marina and is pleasantly uncrowded during the quieter weeks of January. Adjacent to it is a private stretch of beach with fine sand and turquoise water – typically for Abu Dhabi, it's significantly quieter than the public beaches in Dubai. The spa area, with its hammam, sauna, and several treatment rooms, is compact but well-equipped; massages are particularly rewarding after a long day of sightseeing or a drone flight in the desert.

Why the Rixos Marina is a perfect base camp

The key advantage: all of Abu Dhabi's major attractions are within a 10-30 minute drive – the Grand Mosque, the Louvre, Saadiyat Island, Yas Island, Emirates Palace, and Qasr Al Watan. At the same time, the waterfront location offers a completely different experience than typical city hotels: waking up to views of the marina from your balcony and relaxing by the pool with a glass of wine after editing content. For a travel creator who produces content during the day and edits in the evening, this combination of a central location and tranquility is invaluable.

Important: the resort has No marina directly on the open sea, It's located on the Al Bateen Channel, but rather on the Al Bateen Canal – the beach is therefore more of a quiet bay beach than a classic sandy beach with waves. Those who prioritize a beach should also plan an afternoon at Saadiyat Public Beach.

Louvre Abu Dhabi – The architectural wonder on Saadiyat Island

The Louvre Abu Dhabi on Saadiyat Island is the most impressive building I have ever entered. Jean Nouvel's design consists of a colossal dome composed of 7,850 stars in eight different layers. Sunlight filters through the dome, creating an ever-changing play of light on the floor – the so-called twilight. Rain of Light. For photography, the space is like a studio without artificial setup: just sun, marble, and water.

The collection itself is one of the best in the world: works by Da Vinci, Monet, Magritte, and Ai Weiwei—arranged not by culture, but chronologically by theme. Egyptian sarcophagi stand next to Japanese bronzes and medieval European sculptures. Entry costs 63 AED (approximately €16)—a bargain for what's on offer.

Drone notice: Flying drones is prohibited inside the Louvre. However, the public area of the promenade in front of the museum offers a perfect view of the dome and the surrounding water; early morning before opening offers the best conditions for photography (even without a drone).

Sheikh Zayed Grand Mosque – The largest mosque in the UAE

The Sheikh Zayed Grand Mosque is not just a religious building—it's a statement. With 82 domes, over 1,000 columns, the world's largest hand-knotted carpet (5,627 square meters!), and seven chandeliers made of Swarovski crystals, the mosque offers free admission to visitors of all religions and nationalities—a sign of openness that is not always a given in the region.

Visiting rules: Visitor guidelines: Men must wear long trousers and have their shoulders covered. Women will be provided with a free abaya (long robe) and headscarf at the entrance. Photography is permitted and encouraged—the mosque is extremely photogenic and was intentionally designed to be an Instagram magnet.

Best time: Thirty minutes before sunset. The white marble reflects the warm evening light, and the architectural lighting switches on at dusk. The combination of natural and artificial light is most beautiful between 5:30 and 6:15 p.m. in winter. Attention drone: The mosque is located in a strict no-fly zone – drones are immediately confiscated by security personnel.

Liwa Desert and the Empty Quarter

Abu Dhabi borders the Rub' al Khali, the Empty Quarters – the world's largest sand desert. A desert safari is a must, but avoid the touristy dune-bashing tours that race across the desert in two hours. A better option is an overnight trip to the Liwa Oasis, about 200 km south of Abu Dhabi. The dunes in Liwa are the highest in the UAE – reaching up to 300 meters; in the mornings and evenings, when the shadows lengthen, the landscape looks like another planet.

Cost for an overnight desert tour: from €200 per person including transport from Abu Dhabi, desert camp, dinner and breakfast. Luxury option in Qasr Al Sarab Desert Resort (Anantara): from 500 euros per night, one of the most spectacular desert hotels in the world, right in the middle of the dunes.

Saadiyat Island – Culture and tranquil beaches

Saadiyat Island is Abu Dhabi's cultural island. Besides the Louvre, the... Guggenheim Abu Dhabi and that Zayed National Museum. Saadiyat also boasts the city's most beautiful public beach: fine white sand, turquoise water, and nesting sea turtles. Entrance to Saadiyat Public Beach costs 25 AED (approximately €6), including a sun lounger and parasol – it's about a 20-minute drive from Rixos Marina.

Costs – What does Abu Dhabi cost?

Abu Dhabi is more expensive than most destinations, but noticeably cheaper than Dubai. Here's a realistic budget overview – including a premium option with a stay at Rixos Marina:

PositionCost per day
4-star hotel80-150 €
5-star hotel (e.g. Rixos Marina)350-600 €
Food Restaurant Mid-range20-40 €
Taxi within the city5-15 €
Louvre Abu Dhabi16 €
Desert Safari Day Tour80-150 €
rental car30-50 €
Daily budget for middle class120-200 €
Budget per day Premium incl. Rixos Marina500-700 €

Money-saving tip: Friday is the day in Abu Dhabi Brunch day. Many 5-star hotels offer all-you-can-eat brunch with drinks (including alcohol) for 50-80 euros per person – an experience that is worthwhile both culinarily and in terms of price.

Practical tips for Abu Dhabi

Best time to travel: November to March. In summer (June-September), temperatures reach 45-50 degrees Celsius – unbearable for outdoor sightseeing. My visit was in January: 22-28 degrees during the day, a pleasant 15-18 degrees in the evening.

Transport: Rental cars from €30 per day are the most efficient option; gasoline is extremely cheap (around €0.55/liter). Taxis are also cheap and safe. Not Uber, but Careem (The local alternative) works perfectly.

Alcohol: Available in hotels and licensed restaurants – at the Rixos Marina, both at the pool bar and in all restaurants. Alcohol is prohibited in public and in supermarkets. Prices: Cocktails €15-20, Beer €10-12.

Clothing: Discreet, but not overly conservative. Shorts and T-shirts are perfectly acceptable in hotels and malls. Long clothing is required in mosques and government buildings.

FAQ – Abu Dhabi and Rixos Marina

Is the Rixos Marina Abu Dhabi a worthwhile base camp?

Yes, especially for travelers who want to explore the city and surrounding area during the day and relax by the water in the evening. Its central location between downtown and Saadiyat Island, marina access, tranquil atmosphere, and consistently high level of service make it a great all-around hotel. For a purely beach holiday, Saadiyat or Yas Island would be more suitable.

Do I need a visa for Abu Dhabi?

No, Germans receive a free 90-day visa upon arrival at the airport. A passport valid for at least six months is required.

Is Abu Dhabi safe?

Extremely safe. Abu Dhabi has one of the lowest crime rates in the world; you can walk around the city without any problems at any time of day or night. The Rixos Marina itself has 24-hour security and controlled access.

How do I get from Rixos Marina to the sights?

By taxi or Careem: Grand Mosque in approximately 15-20 minutes, Louvre in 20-25 minutes, Yas Island (F1 track, Yas Waterworld) in 25-30 minutes. Even more flexible with a rental car – the resort has free underground parking for hotel guests.

How do I get from Abu Dhabi to Dubai?

By car, it takes about 90 minutes via the E11. Buses run hourly (25 AED / 6 Euro). Taxis cost approximately 250 AED (60 Euro) one-way. A day trip to Dubai is easily doable.

Which months are best for content production at the Rixos Marina?

November, December, January and February – pleasant temperatures, clear air, perfect light for drone photography in the morning and evening. March/April are still good, but from May onwards the midday heat becomes critical for outdoor shoots.

Can I fly a drone at Rixos Marina?

Drones are only permitted in the immediate vicinity of the hotel after consultation with hotel management. Generally, strict drone regulations apply in Abu Dhabi: official registration with the General Civil Aviation Authority (GCAA) is mandatory, and several zones – the city center, the airport area, and religious buildings – are no-fly zones. For professional content production, it is best to clarify the necessary permits in advance with a local producer.

Max Haase Travel Creator
About the author

Max Haase

Travel Content Creator · Drone Photographer · Visual Storyteller

Since over 10 years professional travel creator with over 4.2 million followers. Specializing in high-end tourism board collaborations and visual travel storytelling.

4.2MFollowers
82+Countries
500+Cooperations
10+Years

You might also be interested in this

Blog – Travelogues Drone footage — Image 11

Vietnam Phu Quoc: Weather, hotels & best time to travel to Vietnam

Phu Quoc — Vietnam's tropical island paradise in the Gulf of Thailand

When I first heard about Phu Quoc, my reaction was honestly: Where is that, anyway? A Vietnamese island in the Gulf of Thailand, closer to Cambodia than to Ho Chi Minh City—it didn't exactly sound like an obvious travel destination. But that's precisely what makes Phu Quoc so special: For most German travelers, this island is still a blank spot on the map, while for Asian tourists it's already a hotspot. After a week on the island, I can say: Phu Quoc completely surprised me—and deserves far more attention.

  • Arrival: From Ho Chi Minh City, a 55-minute flight; ferry from Ha Tien for 12 euros with a Cambodia combination ticket — 30 days visa-free for Germans.
  • Beaches: Sao Beach with the whitest sand in Southeast Asia; Ong Lang Beach as a quiet alternative; Starfish Beach with hundreds of starfish.
  • Hon Thom cable car: The world's longest overwater cable car, 7.9 km long, up to 170 m above sea level; ticket only about 10 euros for a 15-minute panoramic view.
  • Cost: Street food meal 2-5 euros, scooter from 5 euros per day, snorkeling tour 15-25 euros; weekly budget from 800 euros.
  • Travel time: November to March is the dry season with temperatures between 28-32 degrees Celsius and plenty of sunshine; Long Beach offers a different sunset every evening.

Getting there — How to get to Phu Quoc

Getting to Phu Quoc is easier than you might think. Since the international airport opened in 2012, there have been direct flights from Ho Chi Minh City (55 minutes), Hanoi (2 hours), and even some international destinations like Singapore, Seoul, and Bangkok. From Germany, the best option is to fly via Ho Chi Minh City—the connection is both affordable and efficient.

Alternatively, there's a ferry from Ha Tien on the Cambodian border, which takes about 90 minutes. This route is worthwhile if you've already traveled around Cambodia—it's only 5-6 hours from Phnom Penh to Ha Tien. The ferry costs around €12 per person, and the crossing through the Gulf of Thailand is an experience in itself when the weather is good.

German citizens enjoy a significant advantage: Vietnam grants visa-free entry to Phu Quoc for up to 30 days, even without a Vietnamese visa. However, this only applies if you remain on the island. If you wish to travel to the mainland afterward, you will need a regular visa (e-visa online, approximately USD 25).

Phu Quoc Beaches: Long Beach, Ong Lang Beach & Hidden Gems

Phu Quoc boasts over 150 kilometers of coastline and some of the most beautiful beaches in Southeast Asia. The most famous is Long Beach (Bai Truong) on the west coast—a roughly 20-kilometer stretch of sand where most of the hotels and resorts are located. The sunset here is legendary: a perfect golden sphere sinking into the Gulf of Thailand. I photographed it every single evening of my stay, and each time it looked different.

But the real highlights lie away from Long Beach:

Sao Beach (Bai Sao) — The Instagram beach

Sao Beach in the south of the island has the whitest sand and the most turquoise water I've seen in all of Southeast Asia. Seriously—the water is so clear you can see 5 meters down to the seabed from the jetty. The wooden swings in the water have become a popular photo spot, and yes, I couldn't resist either. Tip: Arrive early in the morning (before 9 a.m.) and you'll practically have the beach to yourself. From 10 a.m. onwards, the day-trippers arrive and it gets crowded.

Ong Lang Beach — My personal favorite

Ong Lang Beach Ong Lang Beach on the northwest coast is what Long Beach was 10 years ago: quiet, unspoiled, and with a fraction of the tourists. Palm trees still stand right on the water's edge, small boutique resorts are nestled in the greenery, and in the evenings you hear nothing but waves and crickets. Ong Lang is perfect for drone photography—the coastline with its rock formations looks spectacular from above.

Starfish Beach (Bai Rach Vem) — Surreal nature experience

Starfish Beach lies in the north of the island, and the name says it all: Hundreds of orange-red starfish float in the shallow, crystal-clear water. It feels like an aquarium, only you're right in the middle of it. Please don't touch them or take them out of the water—the starfish are delicate. Taking photos and marveling at them is perfectly sufficient.

You might also be interested in this

Blog – Travelogues Drone footage — Image 11

Malaysia Travel Report 2026: Round Trip, Sights & Tips

Malaysia Travel Report — Kuala Lumpur, Langkawi & Borneo in 3 Weeks

Malaysia was the country that taught me Southeast Asia is more than just Thailand and Bali. Less touristy, cheaper, more diverse, and—I say this as someone who has eaten in over 60 countries—with the best street food in the world. In three weeks, I explored Kuala Lumpur, flew my drone over mangrove forests on Langkawi, and saw orangutans in the wild on Borneo. Here is my full travelogue.

  • Route: 3 weeks for Kuala Lumpur, Langkawi and Borneo; domestic flights with AirAsia from 15 euros, street food 5-10 euros per day.
  • Merdeka 118: Since 2024, the second tallest building in the world at 678 m; the observation deck on level 116 costs 25 euros and beats the Petronas Towers.
  • Jalan Alor: Chicken wings 1 Euro, satay 0.50 Euro, roti canai 0.30 Euro — a whole evening at 4 stalls for under 7 Euro.
  • Langkawi: 99 islands, Sky Bridge at 660 m, duty-free zone with beer for 1 euro; Kilim Geoforest Kayak Tour 25 euros through mangroves.
  • Borneo: Sepilok Orangutan Rehab: 8 Euro entrance fee, feeding at 10 am and 3 pm; Mount Kinabalu (4,095 m) as a 2-day climb for 200 Euro.

Malaysia's tourist attractions: Kuala Lumpur — The underrated metropolis

Kuala Lumpur is often treated as a stopover—one or two nights, Petronas Towers, then on to the next place. Big mistake. I spent four days in Kuala Lumpur and could easily have stayed a week.

Petronas Twin Towers and KLCC Park

The Petronas Towers are 452 meters tall and a landmark of Malaysia. Impressive from below, but the real wow factor comes from the air. I launched the DJI Mini 5 Pro from KLCC Park (be careful, there are restrictions near downtown Kuala Lumpur) and filmed the towers at sunset—the silver facades bathed in golden light, the Kuala Lumpur Tower in the background, and KLCC Park as a green oasis at the foot of the steel giants. This video was my most successful piece of Malaysia content.

The Skybridge at 170m (level 41) and the observation deck at 370m (level 86) are both worth a visit—but book tickets online in advance, as they often sell out days ahead. Alternatively, the SkyBar in the Traders Hotel next door has a pool with a view of the towers at eye level. Cocktails start at €15, but the view is priceless.

Batu Caves

272 steps, a 42-meter-tall golden statue of Lord Murugan, and at the top, a vast limestone cave housing a Hindu temple. The Batu Caves are a 20-minute train ride from the city center and one of the most photogenic spots in all of Southeast Asia. The colorful staircases (painted in rainbow colors since 2018), the statue bathed in golden morning light, the cave with its natural light wells shining through from above—this is where the Sony A7 IV really shines. camera fully utilized.

Tip: Arrive before 8 a.m., then you'll practically have the stairs to yourself. And be careful: The macaques (monkeys) there are brazen and will steal anything that isn't held onto—sunglasses, water bottles, snacks.

Chinatown and Jalan Alor

Petaling Street in Chinatown is a chaotic market by day (fake watches, souvenirs) and a food court by night. But the true street food mecca is Jalan Alor. An entire street lined with stalls and restaurants that set up their plastic tables on the street starting at 5 p.m. Chicken wings for €1, satay skewers for €0.50, roti canai for €0.30, fresh coconut for €0.80. I ate at four different stalls one evening and spent a total of €7. Seven euros. For the best meal of my life.

Merdeka 118

Since 2024, Merdeka 118, at 678 meters, has been the second tallest building in the world. The observation deck, "The View at 118," on level 116 offers a 360-degree view of Kuala Lumpur, surpassing anything the Petronas Towers can offer. It's not yet overcrowded, as many tourists haven't discovered it yet. Tickets cost approximately €25.

You might also be interested in this

Blog – Travelogues Drone footage — Image 11

Which Canary Island is right for you? Map & comparison

The Canary Islands — seven islands, each with its own unique character. I've traveled to all seven main islands and I'll tell you honestly: the question isn't WHETHER you should go to the Canaries, but WHICH island is right for you. Gran Canaria is so different from Lanzarote, and Tenerife has hardly anything in common with La Palma.

  • Islands in direct comparison: All seven main islands plus Madeira – from Gran Canaria as a miniature continent to El Hierro as the wildest outpost with its own unique profile.
  • Tenerife for hikers: Mount Teide (3,718 m) is Spain's highest mountain; plus Anaga laurel forest and whale watching off Costa Adeje – budget around €60–110 per day.
  • Lanzarote as Mars on Earth: Timanfaya National Park with lava fields, César Manrique architecture and wine cultivation in the craters of La Geria – drone favorite of the Canary Islands.
  • Fuerteventura & La Palma: Fuerteventura offers endless beaches and kitesurfing winds; La Palma scores as the greenest hiking island with one of the best starry skies in Europe.
  • Decision aid: Families and all-rounders: Gran Canaria. Peace and nature: La Gomera or El Hierro. Surfers: Fuerteventura. Culture and photography: Lanzarote.

In this guide, I compare all seven islands in terms of landscape, weather, activities, costs and vibe — so you know immediately which Canary Island will be your next travel destination.

Canary Islands on the map — Location & Geography

Canary Islands map — all 7 main islands off the west coast of Africa
Canary Islands map: The 7 main islands in the Atlantic Ocean — about 100 km off the west coast of Africa (Morocco and Western Sahara). Madeira (Portugal) lies about 500 km north of the Canary Islands.

The Canary Islands map The map above shows the situation at a glance: The islands belong politically to Spain and are organized as an autonomous region—geographically, however, they are significantly closer to Africa than to the Spanish mainland. The easternmost point of the islands (Lanzarote) is only 125 km from the Moroccan coast, while Madrid is 1,800 km away. This location at subtropical latitude (27–29° North) is also the reason for the year-round spring-like weather for which the Canary Islands are so well known.

The archipelago consists of seven main islands and several smaller islands. From west to east: El Hierro, La Palma, La Gomera, Tenerife, Gran Canaria, Fuerteventura and Lanzarote. All are of volcanic origin — hence the dramatic landscape with craters, lava fields and black beaches.

A comparison of the 7 Canary Islands


IslandcharacterPerfect forBudget/day
Gran CanariaAll-rounder, miniature continentFamilies, beach + mountains, nightlife60–100 €
TenerifeVolcanic giant, diverseHikers, Teide, whale watching60–110 €
FuerteventuraDesert & Endless BeachesKitesurfers, beachgoers, peace and quiet50–90 €
LanzaroteVolcano art, Martian landscapeCulture, drone, wine lover55–95 €
La PalmaGreen hiking island, starry skyHikers, nature, astrophotography50–85 €
La GomeraPrimeval forest, mystical, GarajonayHikers, those seeking peace and quiet45–80 €
El HierroSmallest, wildest, quietestDivers, dropouts, adventurers40–70 €

Gran Canaria — The miniature continent


Gran Canaria packs everything onto one island: Saharan dunes (Maspalomas), green mountain valleys (Barranco de Guayadeque), cosmopolitan cities (Las Palmas), and secluded mountain villages. I call it the "miniature continent" because you can lie on the beach in the morning and hike at an altitude of 1,900 meters in the afternoon.

Highlights: Maspalomas dunes (especially at sunset), Roque Nublo (landmark of the island), Las Palmas old town Vegueta, Puerto de Mogán (the „Venice of the Canary Islands“).

Read my detailed review Gran Canaria travel report including all drone footage.

Lanzarote — Where volcanoes meet art


Lanzarote is the most cinematic of the Canary Islands. The volcanic landscape of Timanfaya National Park looks like Mars—red, black, and ochre lava fields as far as the eye can see. Add to that the wine-growing regions of La Geria, where vines grow in volcanic craters.

The artist César Manrique shaped the island like no other. His works — Jameos del Agua, Mirador del Río, Fundación César Manrique — are artworks that blend seamlessly into the volcanic landscape.

From the air, Lanzarote is absolutely breathtaking. The color contrasts between black lava, red sand, and turquoise sea are surreal. My Lanzarote travelogue shows the best spots.

Fuerteventura — wind, waves and wide open spaces


Fuerteventura is the island for kitesurfers, surfers, and anyone looking for endless beaches without crowds. The island is flat, dry, and windy—perfect conditions for water sports.

The beaches are the most beautiful in the Canary Islands: Playa de Cofete (wild and secluded), Playa de Sotavento (kitesurfing paradise), El Cotillo (surfer village). The desert landscape inland is photogenic, but less spectacular than Lanzarote's volcanoes.

All the details are in my Fuerteventura travel report.

Tenerife — Mount Teide and more


Tenerife is dominated by Spain's highest mountain — Mount Teide (3,718m). The caldera surrounding the volcano is a lunar landscape that is particularly magical at sunrise. The cable car takes you to 3,555m (summit only with a permit).

In the north, Tenerife is green and lush (Anaga Mountains, laurel forests), while in the south it is dry and touristy (Playa de las Américas). Puerto de la Cruz in the north is the most charming town on the island.

La Palma — The green hiking island

La Palma is the greenest and least touristy of the main Canary Islands. While Lanzarote is portrayed as a Martian landscape and Fuerteventura as a desert, La Palma offers a quiet contrast: subtropical laurel forests, deep volcanic gorges, and one of the darkest starry skies in Europe. The island is officially a UNESCO Biosphere Reserve and a Starlight Reserve.

For whom: Hikers, nature lovers, astro-photographers, those seeking peace and quiet.

Must-see:

  • Caldera de Taburiente — the world's largest erosion crater, spectacular hikes
  • Route of the Volcanoes — 24 km long-distance hiking trail across a volcanic chain
  • Roque de los Muchachos (2,426 m) — Observatory and one of the best starry skies in Europe
  • Los Tilos — mystical laurel forest with waterfalls

Budget: €55–85 per day (cheaper than the major islands, little package tourism).

Restrictions: Following the 2021 volcanic eruption, some regions in the south are still in the reconstruction phase. The main tourist areas (Santa Cruz, El Paso, Los Llanos) are not affected.

La Gomera - The wild mountain paradise

La Gomera is one of the smallest of the Canary Islands (370 km²) and can only be reached by ferry from Tenerife. This is precisely what makes it a hidden gem: no direct flights, hardly any package tourists, instead endless mountain trails, hidden coves and the unique UNESCO World Heritage Site of Garajonay National Park — one of the last laurel forests in Europe.

For whom: Hikers, backpackers, culture enthusiasts, off-the-beaten-path travelers.

Must-see:

  • Garajonay National Park — UNESCO World Heritage Site, cloud forest with trees up to 1,000 years old
  • Valle Gran Rey — the hippie bay of the Canary Islands, black sand beach and sunsets
  • Los Órganos — spectacular basalt columns visible only from a boat
  • Silbo Gomero — the famous whistling language (UNESCO cultural heritage), is still spoken today.

Budget: €60–90 per day (accommodation is cheap, restaurants are expensive due to the island location).

Arrival: Ferry from Los Cristianos (Tenerife), 50 minutes. Flights are only available from Tenerife North.

El Hierro — The wildest outpost

El Hierro is the smallest and westernmost of the Canary Islands—until 1492, it was considered the end of the known world. Today, it is one of the few European destinations that can be powered entirely by renewable resources. The island has no traditional beaches, but instead boasts dramatic cliffs, volcanic craters, and some of the best diving spots in Europe.

For whom: Divers, geology enthusiasts, off-grid travelers, minimalists.

Must-see:

  • Mar de las Calmas — protected marine reserve with dolphins, turtles, whales and crystal-clear water
  • El Sabinar — wind-shaped juniper trees, one of the most surreal motifs of the Canary Islands
  • Mirador de la Peña — a viewpoint designed by César Manrique overlooking the entire island
  • Orchilla Lighthouse — the westernmost point of Spain and former prime meridian (before Greenwich)

Budget: €50–80 per day (budget island, limited luxury options).

Arrival: Direct flights are only available from Tenerife or Gran Canaria, or by ferry.

Madeira — The Flower Island (Bonus Recommendation)


Technically not a Canary Island (but belonging to Portugal), but often combined in the same trip. Madeira is the hiker's paradise of the Atlantic — the famous Levada walks lead along historic irrigation channels through laurel forests and spectacular gorges.

More on this in my Madeira travel report.

Which island is right for you? — Decision-making aid


  • First Canary Islands trip: Gran Canaria or Tenerife — the most diverse
  • Beach + Kitesurfing: Fuerteventura
  • Photography + Drone: Lanzarote (volcanoes) or La Palma (starry skies)
  • Hike: La Palma, La Gomera or Madeira
  • Peace and quiet + Getting off: El Hierro or La Gomera
  • Nightlife: Gran Canaria (Las Palmas, Playa del Ingles)
  • Family: Gran Canaria (best infrastructure) or Tenerife

Best time to travel & which island is the warmest?

The Canary Islands are rightly marketed as the "Islands of Eternal Spring" — the average temperature remains between 18 and 25 °C all year round. But there are significant differences between the islands and between the north and south sides of each island.

Which Canary Island is the warmest?

The Fuerteventura is the warmest of the Canary Islands., closely followed by Gran Canaria (South) and Lanzarote. The reason: its location in the east, closer to the African mainland, plus its flat topography without high mountains to block the clouds. Fuerteventura's average annual temperature is 22.4 °C. In winter (December–February), the daytime temperature remains stable at 20–22 °C, and in summer at 26–28 °C.

Temperature comparison of the main islands (annual average)

  • Fuerteventura: 22.4 °C — warmest island, very stable temperatures
  • Gran Canaria (South): 22.2 °C — warm, dry south, green north
  • Lanzarote: 21.9 °C — warmer but windier than Gran Canaria
  • Tenerife (South): 21.5 °C — warm in the south, significantly cooler in the north
  • La Palma: 20.1 °C — cooler due to altitude and northeasterly aspect
  • La Gomera: 20.3 °C — mild, often trade wind clouds in the north
  • El Hierro: 20.0 °C — windy and cool, warmest coasts in the south

Best time to travel for each type of trip

  • Beach vacation: Possible year-round, ideal October–April
  • Hike: March–May and September–November (pleasant temperatures, little rain)
  • Kitesurfing/Surfing: November–March (trade winds strongest)
  • Starry sky (La Palma): August–October (clear nights, few trade wind clouds)
  • Diving (El Hierro): August–October (best view)

FAQ — Frequently Asked Questions about the Canary Islands

Are the Canary Islands 7 or 8 islands?

The Canary Islands consist of seven inhabited main islands and several small neighboring islands. It has also been officially recognized as such since 2018. La Graciosa (northwest of Lanzarote) is recognized as the eighth island — but it has only around 700 inhabitants and no airport. In a travel context, the seven main islands are usually mentioned: El Hierro, La Palma, La Gomera, Tenerife, Gran Canaria, Fuerteventura, and Lanzarote.

Do the Canary Islands belong to Africa or Europe?

The Canary Islands politically belong to Spain and thus to European Union. Geographically, however, they are located on the African continental plate, only about 100 km off the coast of Morocco and Western Sahara. For travelers, this means: EU entry with a national identity card, the euro as currency, German-speaking doctors in tourist areas — but the subtropical climate of Africa.

Which Canary Island is the warmest?

Fuerteventura With an average annual temperature of 22.4 °C, it is the warmest of the Canary Islands. The south of Gran Canaria (Maspalomas) is only slightly behind at 22.2 °C. In winter (December–February), these two islands are the most reliable choice for consistently warm temperatures of 20–24 °C.

Which Canary Island is the cheapest?

For package holidaymakers Gran Canaria The wide selection of flights and hotels often makes it the cheapest option (from €400 per week in the off-season). Independent travelers are La Palma With €55–85 per day and affordable accommodation, it's the cheapest island. Lanzarote and Fuerteventura They are priced in between, Tenerife It is most expensive in tourist hotspots.

Which island is suitable for families?

Gran Canaria It is the most family-friendly island: extensive package holiday infrastructure, child-friendly beaches in Maspalomas and Playa del Inglés, theme parks (Palmitos Park, Sioux City), good medical care. Alternative: Fuerteventura For a beach holiday with a peaceful atmosphere.

Which island is best for hikers?

La Palma leads by a wide margin — the Caldera de Taburiente and the Ruta de los Volcanes are among the most spectacular hiking trails in Europe. La Gomera and Tenerife (Teide National Park, Anaga Mountains) follow. Those who prefer less mountainous terrain will find more on Gran Canaria Varied highland hikes.

Do I need a rental car?

Yes, on every island except Gran Canaria and Tenerife South. While the Canary Islands have bus connections between larger towns, the most beautiful spots (Caldera de Taburiente, the Anaga Mountains, El Cotillo on Fuerteventura) are only accessible by car. Rental car prices start at €20 per day in the off-season. Note: the mountain roads on El Hierro and La Gomera are winding—not recommended for those prone to motion sickness.

When is the best time to travel to the Canary Islands?

The Canary Islands are a Year-round goal With a pleasant climate all year round. The warmest time for beach holidays is June to October (25–29 °C water). Ideal for hiking and city breaks are March to May and October to November (pleasant 20–24 °C, little rain). Peak season is Christmas/New Year and February to March (Carnival) — flights and hotels are significantly more expensive then.

Since over 10 years professional travel creator with over 4.2 million followers On Instagram and YouTube. Specializing in high-end tourism board collaborations, luxury hotel campaigns, and drone photography from 82+ countries.

4.2M+Followers
82+Countries
500+Cooperations
10+Years

Max Haase Travel Creator
About the author

Max Haase

Travel Content Creator · Drone Photographer · Visual Storyteller

Since over 10 years professional travel creator with over 4.2 million followers. Specializing in high-end tourism board collaborations and visual travel storytelling.

4.2MFollowers
82+Countries
500+Cooperations
10+Years

Load More